
|
BPH 106H SM106 Restoration 2026B |

|
|
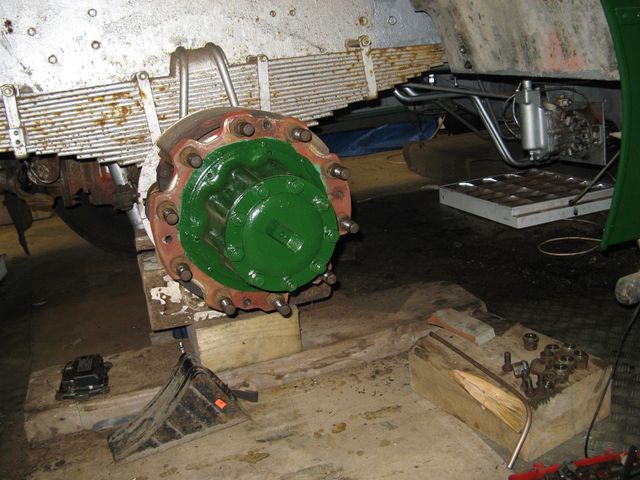
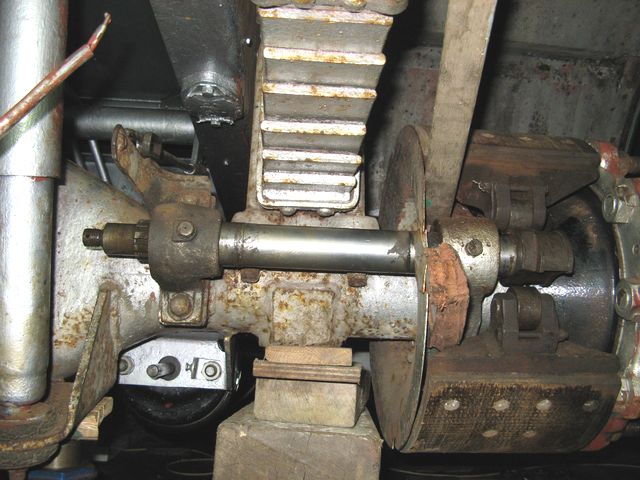
When I arrived at my garage after such a long time of inactivity, I was not feeling particularly enthusiastic as I had rather lost the plot. However, mulling-over the problem of the nuts on the brake camshafts during the recess brought me to an obvious conclusion: try swapping the nuts! That should give a clue, and for once the AEC habit of left and right-hand threads was not in play. Wriggling underneath again and wielding a spanner brought me to my senses, and I soon discovered that both nuts were absolutely fine on the opposite camshafts. Odd! However, while tightening the offside nut I saw that the brakes were being applied with the torque, which is impossible as that is the direction for pulling OFF the brakes. "Curiouser and curiouser", as Alice would say. I realised rather rapidly that the only way forward was to remove wheels and brake-drum and open up the job to proper scrutiny. It didn't take long as the nuts were only tight enough to take weight, and the drum has been off tolerably recently. The strange behaviour was because the brakes had not been adjusted on that side, and the rollers were sitting on the wrong side of the cam, which I had imagined. However, a simple attempt to adjust the brakes properly failed completely! Time for a lesson on slack-adjusters...... A ratchet device is used to adjust the slack automatically, but they didn't last long and the process can be done manually anyway. The heavy-duty worm wheel that rotates the lever relative to the splines that engage on the camshaft has a slot which is engaged by the adjuster-ratchet mechanism and it proved impossible to engage the drive-dog to tighten the brakes, but slackening was possible. Fortunately, the camshaft can be slid out far enough to disengage the operating lever, but the hub must be removed to draw the camshaft completely out (I know this because I did it, a very long time ago and I am jolly glad that I did because the traditional source of re-manufactured camshafts does not bother doing it any more). Time to break out my spare camshaft lever, which was a present from Mike Lloyd many years ago, and it turned out to be an offside fitting. It did not disassemble in the way I had done with my own, but it proved to be seized-up and it would not fit onto my camshaft anyway. Nonetheless, it taught me a lot and I went back to reassemble my own while playing attention to the fit of parts. The ratchet casting sits on a machined top-hat device which also forms a bearing for the dog-end of the worm wheel. The top-hat has a machined recess in the boss of the camshaft lever, except that try as I might it would not sit properly. Suddenly it dawned on me: the damaged drive-dog was BECAUSE it was not seated properly, and presumably reflects a bodged attempt at component swapping while still in service. I had a cup of tea while I gently fettled the top-hat device with a large file, and after quite a while I was able to press it home on the lever, mount and pin the ratchet mechanism and wind it around while watching the slotted pinion turn beautifully as it should without further attention.
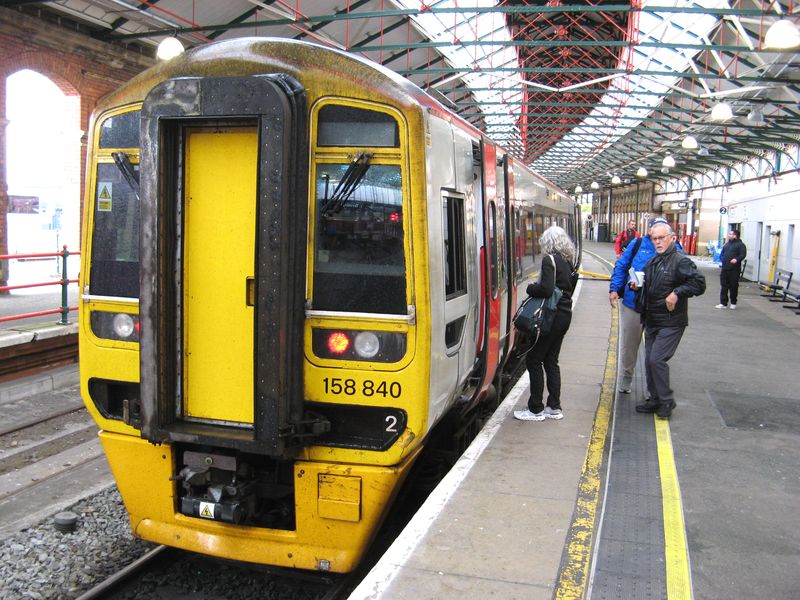
By now, however, despite having a working slack-adjuster I was becoming tired and didn't fancy messing with the brake drum. In addition, I was becoming increasingly dissatisfied with the grubby state of the operating lever and the crusty area of the axle where it mounted, so I gave up and went home while leaving the task open for another session in the near future. Besides, there is another matter to attend to: the impending timetable change on the North Wales Coast line will see the end of scheduled class 158 heritage units to Holyhead, and I need to ride on one to complete the mileage that they operate still. I had a good bash at the Cambrian recently, but they are safe for now; just three days left on our line beyond Llandudno Junction as I type this! Well, it worked like clockwork at the second attempt! After the Tuesday disappointment of a substituted class 197 Civity unit, Thursday's performance could not be beaten and everything worked to the minute. It was an absolute joy to run at a high line-speed on a comfortable train with such a long history of serving North Wales on an interesting route. It was very informative to compare the journey experience having sampled both trains in a short period under identical circumstances.
The next rail adventure was on the following Monday to mark the start of the new North Wales Coast timetable by riding the first departure from Deganwy to Liverpool Lime Street at 0738h aboard 197 043, unfortunately. Arrival was 5 minutes late after a very slow and plodding journey from Frodsham Junction and congestion from Wavertree Junction ending with a wait for a platform. I de-trained promptly and made for the Merseyrail Northern Line for a bit of sightseeing in Southport, then returned via Central and Liverpool South Parkway and arrived home exactly on time after 162 miles. The only surprise was just how poor the ride on 197 111 was, the general chuntering deteriorating into quite uncomfortable shaking on stretches near Prestatyn and Llanddulas (PWEng please note). This was a very satisfying trip, because it was far enough away to be out of reach during the on-off years of 'parliamentary' operation on the Halton Curve, and I last travelled on the line in the early 1990s (exact date is under research) after commentary about the end of the final Llandudno - Liverpool trains in Modern Railways magazine. It worked for the Woodhead Line, so don't knock it! I promise to be silent about trains now they are out of my system. In other news: Mike's slack-adjuster problem needed solving if the whole assembly turned out to be useful, so the lever was held in the vise and treated more forcefully. I was encouraged, but puzzled to find that there was a slot in the spindle and that it was empty! Logic dictated that the whole slack-adjuster should fall apart, but it didn't. Tapping on the stem or the fat washer had an effect, but limited because of the spring which ensures the engagement of the dog on the worm wheel. I used a large spanner to lift the ratchet mechanism against the spring, and started to tap the stem with a drift and a big hammer. Without much fuss, the stem slid through the fat washer and the whole mucky, greasy mess came apart. Why someone had forced the fat washer over the stem so violently cannot be known. Initially I was thinking about parts swapping, but the wobbly fit of my 'original' lever made me think again about why it would not fit the camshaft, added to which the bushes for the clevis pins were in much better shape. Examination showed that it was the lipped bush that was loose in the lever, which was a surprise, and it came out easily. The 'spare' lever appeared to have a brass bush pressed into place and I didn't want to damage that if it was just tight on the shaft.
With the slack-adjuster out of the way it was smaller and lighter, so I had another go, though still with no joy. Very aware that my camshaft had been remanufactured and would be full-size (or over) I used a half-round file to bevel the entry of the bush slightly, and the shaft started to enter but bound-up. Only one thing for it: an improvised hone using a broom handle and a spiral wrap of emery cloth! After a generous oiling, the first fitting was an encouraging failure, but at the second attempt the camshaft slid home with a satisfying clunk and no shake. A celebratory lunch was taken before the lever was cleaned-up with paraffin and a wire brush, dried-off and painted in red primer. As it was still too early to go home, I found the strap which had been painted recently and used it to drill and fit the new offside mudflap and put new bolts into the mudguard stay. Then it really was time to go home. My next visit was a composite mission on Bank Holiday Monday, taking our dogs for a bit of hill, forest and moorland exercise and meeting not a single person, which is quite something for the Eryri National Park and fisticuffs breaking out in the queues for selfies on Yr Wyddfa! The walk was planned carefully so that the bus garage was on the route to the forest, so on the return leg we arrived at lunchtime and immediately painted the brake lever in a silver top coat, then had packed lunch and cut the grass on the field. As it was a fine, warm day the paint had dried nicely by the time I put away the mower, so a second coat was applied and we went home. A few days later, I went back for a proper session with a view to reassembling the brake lever and fitting it to the camshaft. If only it was so simple! It was a long and messy process that led to the discovery that the worm and pinion would spin individually very smoothly in their machined recesses, but lock-up when in mesh. A lot of time was wasted before I discovered that (maybe due to wear) there were places on the pinion that worked, and others that did not. With fingers crossed, and the recesses packed with fresh grease, the ratchet device was pinned on the spindle and the lever offered-up to the camshaft. The brake drum was hoisted onto the hub, and the adjustment process commenced. Somehow, magically it all worked swimmingly and a pair of clevis pins were inserted temporarily in the fork-ends of the actuator and handbrake rod. The handbrake rod forks were slightly out-of-true, so there is a bit of work to do there to straighten the fork and ensure that it works freely. I was pleased to go home, I must say, as it was also very warm! Mike's comment when I told him the news was "it always baffled me about exactly how to install them as we were not allowed to nor trained to, so I have never used them, just kept them in case there was ever a need. I am glad you managed to sort out the one I gave you, and also glad to have found a use for it. I hate scrapping things but end up with items which will be useful one day which never comes. I do wonder if whoever installed the item also didn't know how to do it properly and just made the best of a bad job all those years ago. That's the trouble with items recovered from garages - you don't know their history". A fun day was mostly about completing the setup of the slack-adjusters, and sorting-out and fitting a good pair of clevis pins and castle-nuts to finalise the job. Finding the through-hole for the pin is always the key! So, nut off the camshaft, clear the hole and set a reference mark so that it can be found again when the nut is on. It was a bit of a fiddle, but eventually the pin was in and its legs turned over. Then it was the turn of two clevis pins, and carefully rotating the handbrake rod fork so that it was straight on the operating lever. The problem encountered previously was that inserting the clevis pin was seriously hampered by the misalignment, with resultant torque on the handbrake rod. The forks and lock-nuts have not been moved for decades (according to the manual, never, because the rods are set for length and nothing to do with slack adjustment anyway) so I was ready for a battle. It did not arise, a wide spanner was sufficient to overcome initial resistance and the job was done in seconds. Then the clevis-pins were cleaned, greased, inserted and split-pinned. It was a great feeling on the handbrake lever in the cab, and I look forward to real action now that the reason for very poor handbrake performance is explained.
Finally, the generator was started to run the portable compressor and put air on the auxiliaries. The gearbox low-pressure switch was wired-up to a connector strip and the light action observed, while reading off the pressure from the temporary gauge. It took a long while for the air to leak away (with assistance) so that the low-pressure limit could be checked. It turned out that the light-off pressure was a bit too high, and the light-on pressure a bit low, so we have a bit to work at still. It soon became obvious that testing this function while installed on the bus was very difficult, and it also proved impossible to tighten the bolts holding the microswitch unit in place, so the pressure switch and its feed pipe were removed quickly from the bus and a bit of wiring put together to use my radio battery and a reject indicator bulb from my Clio (yes, they are also 12 Volts on the Swift) as a test harness. Despite the immediate efficiency gains and ease of access, it took a while to read the manual, perform, adjust and iterate the pressure cycles required to understand how the thing worked and explore the pressure settings. In particular, nothing I could do would change the light-on pressure, which remained at a rather low 36 psi instead of the recommended 45 - 40 psi. The design is not particularly robust and relies upon the fact that the piston movement has a linear relationship with applied pressure (like a spring-balance) coupled with the inherent range of movement on the microswitch. There is no adjustment for the light-on position, which is therefore determined solely by the length of the piston rod and liable to wear with repeated operation over the several decades. I decided that I will have to live with that, but at least it is predictable. An undesirable situation that I discovered was that the pressure from the reducer was 62 psi, which was well above the rated 55 psi pressure for the gearbox. I was not anxious to disturb the reducer valve, but needs must and it turned out to be straightforward and easy to get the desired pressure. It is interesting that the light-off and gearbox pressures in the manual are exactly the same, but whether that is realistic only time will tell. I feel much happier now that I have explored and understood these matters. At the next visit the pressure switch was put back into place, the pressure reducer was adjusted-up by a couple of psi and the system pressurised and drained to test all the functions. Finally, a length of air hose was installed to connect up to the gearbox EP unit and that was the job finalised apart from the replacement junction box for the wiring. The need for access being reduced, it was time to put the silencer in place and connect up the exhaust pipe to the manifold. Handling the heavy silencer and hanging it with the Ffestiniog Railway straps was not straightforward, and I ran immediately into an issue with the pipe bend fouling the nearside mud-flap. Rotating the silencer wasn't as easy as it sounds, but eventually I found a sweet spot where the outlets, bends and flexible exhaust section all looked about right, though it was necessary to shorten the downpipe and the end of the bend which passed into the silencer. I did not like the way that the downpipe ran very close to the side of the gearbox and the hydraulic lines, so the old downpipe was put back in place for a trial run, and it is clear that the new one is 'wrong' and requires rotating slighly, an operation which is impossible due to the three-point attachment to the manifold. "So it goes", as Kurt would say. For the short to medium term I shall stick with the old downpipe, but I need some clamps and a tailpipe, none of which survive in a useful condition. Having spent the early part of the year cursing the cold, now we have a different problem. Heat! I have been sourcing components to complete the exhaust during the heatwave, but did manage a day which was spent finishing the pipe and cable routing where all the old clips were removed as part of the chassis clean-up. In the course of which, I discovered that I had not run the gearbox air pipe through its clamping saddle and was forced to undo one end of the flexible hose and start again. Luckily the rubber had not settled and it was possible to slide it off after warming with my hand for a bit. Thereafter it was just a case of finding new nuts and screws and clearing the remains of old ones that were sawn-off to release the clips. Curiously, the chassis holes were tapped to take No.10 UNF screws, then nuts were applied on the outside, which is why such difficulty in disassembly was encountered. The corroded remains were drilled or punched out without difficulty, and that was a good job done.
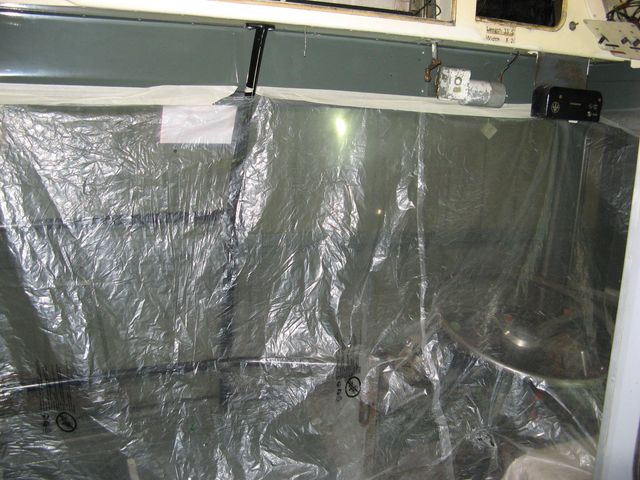
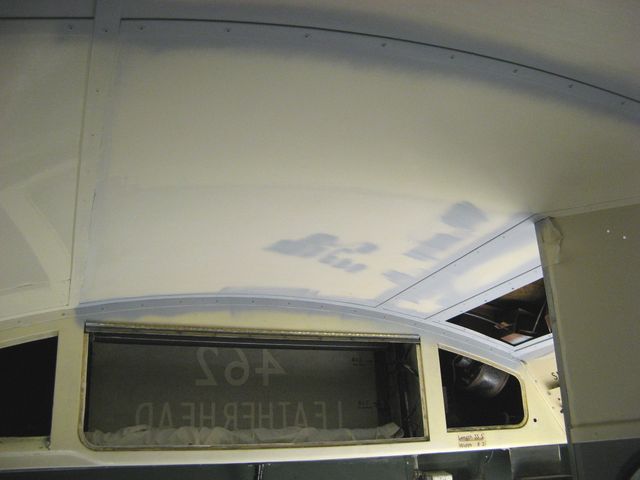
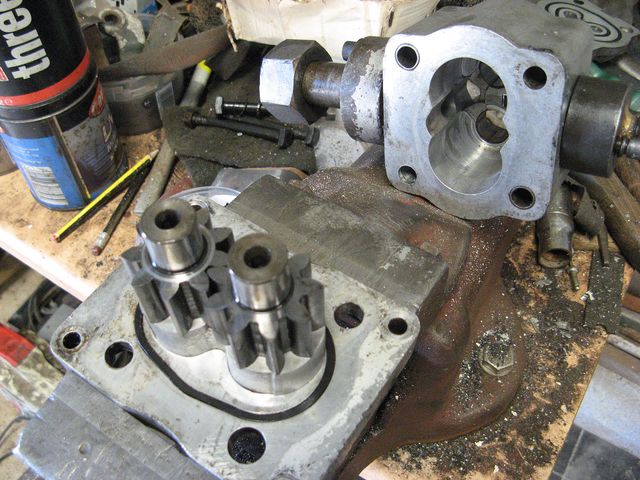
It is a long while since I did any interior work, and the cab header area was disassembled months back, with the portable parts brought home for painting in comfort. The rest of the session was spent in putting up protective sheeting and cleaning/sanding the header and ceiling area ready for its first primer and undercoat. Not a job that I enjoyed, but painting will be a nice change and it needed doing to make the bus presentable from the driver's seat! Now, as coincidences go, this was weird, but handy. My beloved Clio 'Tuppy' had a very slow puncture, but when it went to the Tyre Centre in Llandudno for attention, it wasn't a puncture, but a leak through a patch of electrolytic corrosion under the bead. Apparently it is not uncommon due to the factory attachment of balance weights with a steel clip, said Keith the Tyres (way too many Keiths in my address book). I probed regarding the repair: clean, sand, etch-prime, rub down, paint. Sounding familiar? What etch primer do you use and where do you get it? "Do you want a can" he said, "light or dark grey?" I was very happy, because aerosols of etch primer are not common, and carriage isn't cheap due to hazardous goods regs etc. So on top of a happy Clio, I was now kitted up for spot repairs on the paintwork of the ceiling and cab header, and my exhaust clamps had arrived by carrier, so I was well set-up for another productive session, not that it came to much as our sea breezes failed us and the temperature reached 36°C (according to Tuppy) and apart from fitting two exhaust clamps and cutting my grass I didn't manage much. Some respite from the heat could be gained by lying on the concrete floor under the bus for a siesta, which led me to see that the forward radiator mounting bushes were not installed correctly, a job which took about 15 minutes to correct. The rest of the day was spent on gentle housework in the garage, which is a bit of a mess in places, but at least I could chuck all the old bits of exhaust piping on the scrap pile next door! After the heatwave, a day of temperature that only reached 18 °C was a surprise, and ideal for proceeding with the painting task. The aerosol primer went on beautifully, and was ready for overcoating after an hour. It was a great deal easier than trying to brush-paint the mouldings! I had lunch during the interval, then broke out the gear for roller-painting the area forward of the cab bulkhead which had been prepared previously. I always enjoy the wonderful aroma of the HMG 1K paint system, and interior work concentrates it. I thought it looked good when I'd finished, but even the pale grey was imperfectly covered by the tinted undercoat, so it will need another layer before the coach enamel finish. I'd love to have seen buses being given an interior paint-job at Aldenham, just to study the method. After the painting I started work on the replacement junction box for the gearbox air-pressure switch. Without any direct measurement I had succeeded in purchasing a new box almost exactly the same size as the original. Drilling and screwing under non-ideal conditions for access continued until it was time to go home. I hate to be a weather-bore, but there were huge advantages to the sudden switch to temperatures in the high teens, particularly when paint is on the agenda. Therefore, while the going was good, I put a second undercoat on the cab header area with some success, going on smoothly and covering almost every trace of the grey etch-primer. But that was not the end of the session, even if it was lunch-time! On the other side of the forest, the search for a replacement hydraulic pump was not going well, and no news had been received for many weeks. Kanga and Roo were very excited when they discovered that the spare engine had its hydraulic pump in place, but the condition was unknown. Only one way to find out, and that was to remove it for inspection. Superficially it was very dirty, but it improved after brushing away most of the oily-soil deposits. That was when the wheels came off! Firstly, it was held only by the securing bolts while the circular register plate was missing. Secondly, one of the square-headed clamp bolts which hold the body together was missing. Neither were good omens, but removing the top cover showed that the seals appeared to be in good condition. The mounting gasket was shot, and the condition of the engine oil was utterly filthy. However, recovering the original pump would yield all the parts required, and so the mission was terminated after the completion of cleanup and undoing the inlet coupling union, which was surprisingly tight considering it was on the low-pressure side. The pipe couplings were full of muck, and it took a while to clean out as much as possible because I was unable to budge the cap-headed screws holding the pump connectors so that they could be washed in paraffin.
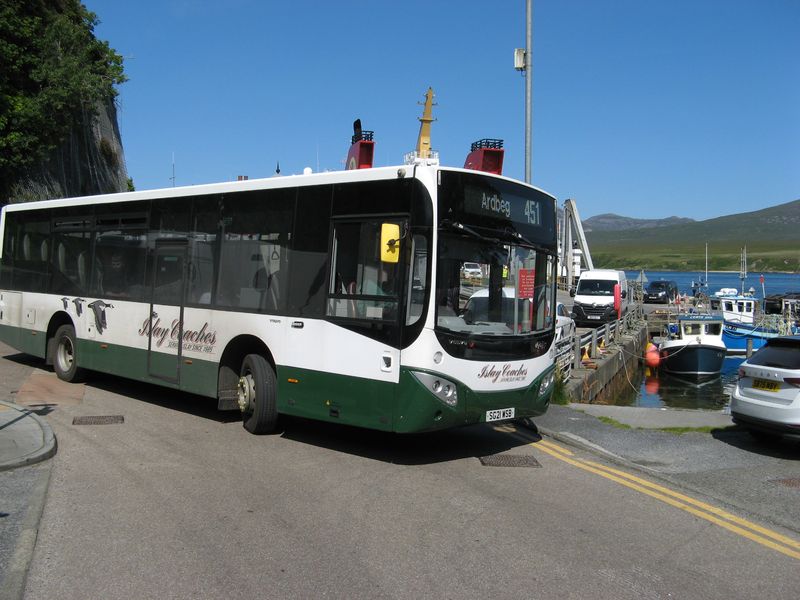
A long pause was mandated during the summer holiday, which we spent on the Hebridean island of Islay. For the duration the entertainment by Calmac ferries was a delight, and our young dog earned his spurs by coping perfectly with no fewer than six crossings of varying duration involving Islay, Jura, Bute and a mainland hop. The last one is a bit contrarian, so if you are interested then buy me a pint one day and I'll explain. By the start of the holiday I had been at the end of my hydraulic tether, and requested the return of the unit from the contractor. The holiday was not spoiled by spending an amount of time thinking through gear-pumps, and ending totally confused because the marked rotation direction of my two hydraulic pumps differed! However, the problem was clear. I had assumed that SM106's pump was correct, and this is where physics (rather than workshop shenanigans) comes to the fore. A gear pump does NOT move oil through the meshing of the gears, rather by carrying oil around their circumference and compressing it where the teeth engage. Therefore the rotation direction is determined by the requirement that the direction of movement of the gear teeth is TOWARDS the inlet when they are in mesh. Look it up on a well-known video-sharing web site if you have doubts. That proves conclusively that SM106's original pump was a lash-up, despite it being more complete than SMS637's. The outlet port of this type of pump is smaller than the inlet, so there is no confusion. All this matters when specifying a replacement, but I am less inclined to think that necessary as time goes on, so long as good parts can be re-assembled between the donors.
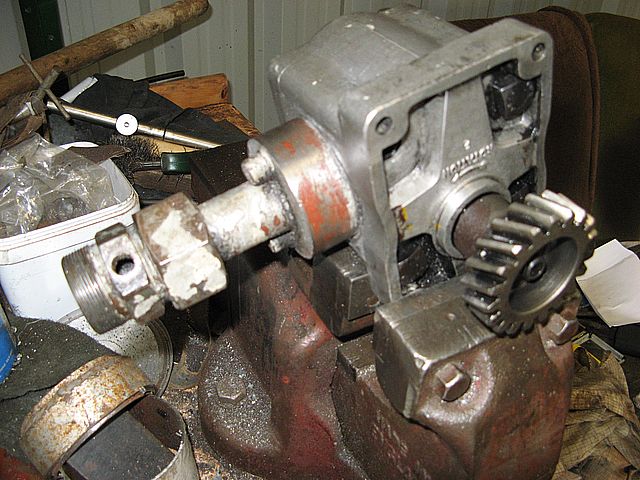
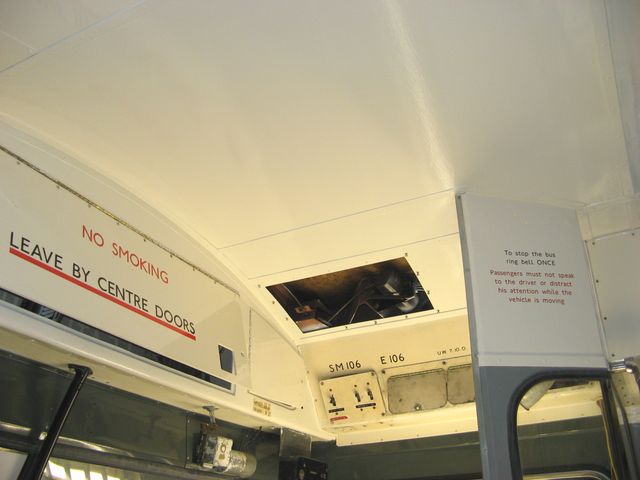
Attempts at home and back at the garage failed to remove the drive pinion from its taper on the hydraulic pump, and with the general irritation level rising to dangerous levels, I decided to cut some grass and then have lunch to calm down. Thereafter, some gentle fettling was in order, so the flap for the destination blind was put back in place (fully labelled already, of course) together with the nest-box doors, which made the header look complete again after many a long year. The vinyl lettering for "To stop the bus" was applied because I thought it was right, and it had already been stored for longer than ideal. The cover for the heating and ventilation control motor was awaiting the removal of stuck, broken screws so I set to with my drills and tap and removed/repaired three out of the four successfully. The rivet nut for the fourth was damaged and fell out. "So it goes", as Kurt would say. New stainless 2BA screws were ready to re-attach it when I had cooled down a bit. The budget locks for the nest-box doors were dug out of stores, cleaned and lubricated and the front plates polished before assembly onto the doors with new raised countersunk screws. I'd had enough then, so the blind-flap fettling waited until the next visit, when the locks were cleaned, lubricated (SAE 90 gear oil, very adhesive and non-drying) and fitted. I also looked at the lamp batten and found a screw short, so I'll order something for later. Continuing attempts to pull the drive pinion off the spare hydraulic pump has not yet succeeded, so I started a voyage of discovery into the original, in case I found anything useful. Not really, was the answer, but it was very interesting. I finished by making a new gasket for the pump mounting plate and went home.
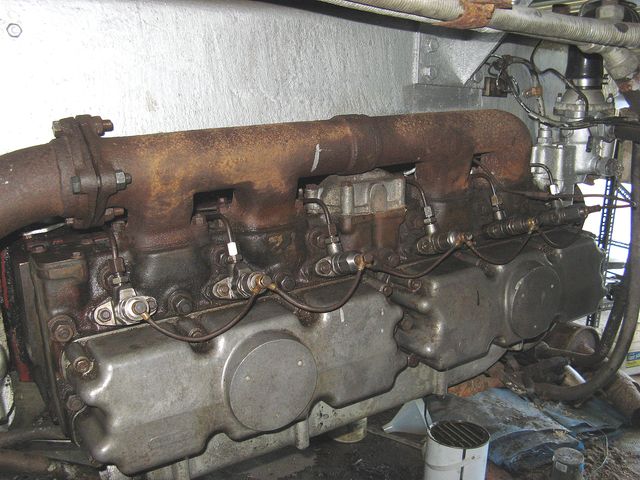
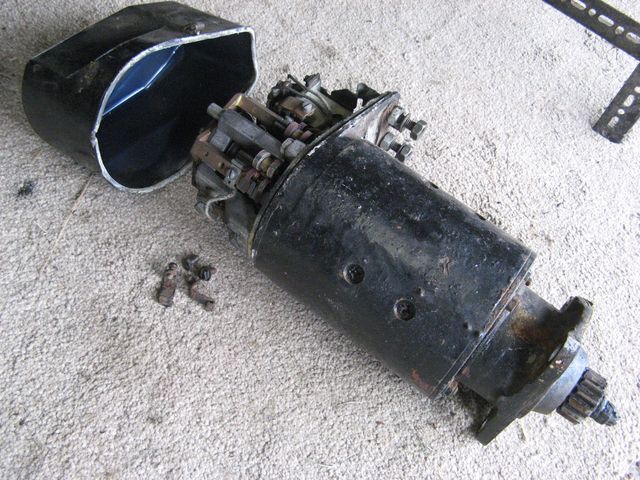
Reassembly of the fuel system has not been a priority, despite the availability of all the components, so the batteries were exercised, charged and installed, which left the leak-off gallery and injectors to finalise. Sadly, the leak-off pipes were elusive, until after a long and careful search they emerged from a well-chosen and safe location where they had been disguised in a lovely, second-hand grip-seal bag printed for hose-clips! Silly mistake. The injection pipes and injectors were installed loosely, then the lift and injection pumps bled, and the (all metal) leak-off gallery installed. All very encouraging until it came to pressing the starter, first to purge the pipes and then to actually start the engine. Well, it did start, and easily, but diesel was spraying and dribbling everywhere. "So it goes", as Kurt would say. Careful examination showed that one of the injection unions had not sealed because the nut had bottomed on the body (we have been there before). Obviously the plug had been substituted during the recent service. I broke out one of the factory-refurbished (in 1989) injectors that came with the bus and put it in place. After that the engine went better, and diesel leaks were apparent only from the leak-off unions. I went over it all again and tightened the hollow bolts carefully, then tried to start the engine once more. Nothing but a click from the starter solenoid switch, and no big "clack" from the pre-engage on the motor itself. It did not take long to remove and open the motor and test for continuity through the pre-engage solenoid. Nothing untoward, so back to the drawing board. Then the phone rang and told me that my missing hydraulic pump parts had been found and delivered, so I cleaned up and went home, calling to pick them up on the way. The irony was not lost that I was talking at the time to a man who was going to have a go at pulling the pinion off the spare pump for me. Sorting out the mounting of the pump would be a leap forward, especially as the old pump (with its new gasket) loses prodigious amounts of sump oil when the engine is running, which was what set me off on this journey. Another journey was in the offing, however, as will be discovered shortly. |




|
BACK .......to the index. |
FORWARD .......to continue the diary. |