
|
BPH 106H SM106 Restoration 2018B |

|
|
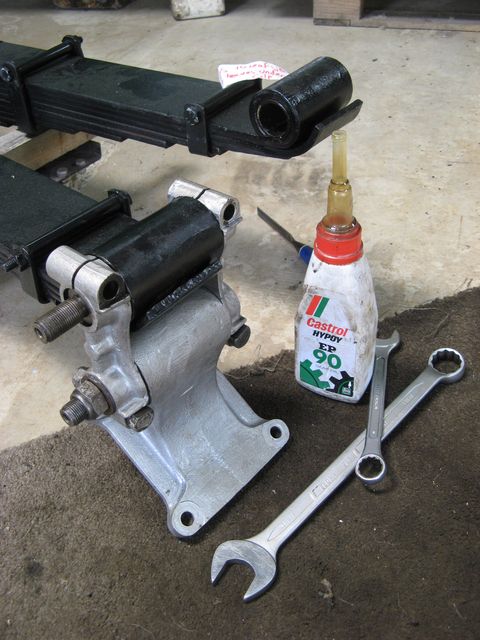
Apart from the obvious requirement to remove the springs for examination and repair as necessary, one of the reasons for removal was the convenience afforded for cleaning-up and painting the chassis and axle thoroughly, so this was done as vigorously and thoroughly as possible. The examination of the springs revealed that on the off-side one leaf was broken and another was cracked, while on the near-side one leaf was cracked (though no problem had been identified earlier). The repairs were completed and the items returned to Colwyn Bay with a very reasonable bill, so I have to commend Owen Springs for their excellent service. Although new bushes were fitted, the supply of new pins was another matter, and since the originals were not seriously worn they were given a liberal coat of thick oil and replaced. It was a surprise to discover that the only thing preventing the springs from sliding longitudinally is a set of dimples and matching pips in each leaf. Because they are clamped tightly together the assembly locks together as a unit, and that includes the clamp plate on the top of the stack. On the offside, corrosion and wear had eroded the locating pip so severely that there was no locating function, and the plate had to be taken to our local engineering works for a new pip to be welded in. They were quick and remarkably cheap, so I was very happy. I also decided to fit new clamp bolts as the originals were quite corroded and wasted adjacent to the spring leaves, while the nuts were a bit rounded from historical abuse. The clamp bolts are listed by AEC as 'special' with cross-drilling for a castellated nut and split-pin, but most of mine were 3/4" UNF with Nyloc nuts (apart from the one which was 3/4" UNC and required a different spanner). So a set of new bolts were sourced from Thomas Smith at Hindley Green, supplied as a box of 10 stock items. Another surprise success! Finding the magic spot where everything lined-up was as trying as I had expected, but with a trolley-jack it was possible to shift the axle fore-and-aft or side-to-side as necessary to get the clamp plates, springs and axle to line up so that the bolts would drop through the fixing holes on the axle and then tighten the assembly, compressing the leaves into a unit. A false start was forgetting to connect the links to the damper arms, but soon sorted. Unfortunately the damper arms made the clamp plate so insensitive to the position of the dimple on the top spring leaf that I feared it would be impossible to find accurately, but it all came together with a bit of critical pressure to locate the assembly properly.
An unexpected bonus was revealed when a bona-fide works-overhaul plate was found attached to the front axle. Not many LCBS Swifts received those, so it is a special heirloom and heritage hallmark. It reads "SM C.12 29 7 76" Ken Russell writes that ten vehicles were overhauled in 1976, but SM106 was not one of those treated at Aldenham, so must instead have been done at Tinsley Green. Please can anybody explain the legend "C.12" ?
Informed readers of this saga have pointed out that the LT Swift was a rather asymmetrical beast, with a preponderance of seating on the offside of the lower saloon, a semi-permanent driver, AEC's own reference to cab structure and steering-gear and finally, and probably greatest, a 35 gallon fuel tank. It is pointed out that sitting overnight with a full tank was tiring to the offside springs, and changing them was fairly common, although bad roads were also blamed. A pair of rather long parcels arrived at work in July; 8 pairs of wide nosing-rubber for four-leaf entrance doors. Heavy and unwieldy, they were difficult to load into my Clio, but actually their flexibility turned out to be an advantage, as they could curve over the passenger seat-back and down into the footwell. At last it was game-on for trying out one of the more troublesome replacement parts.
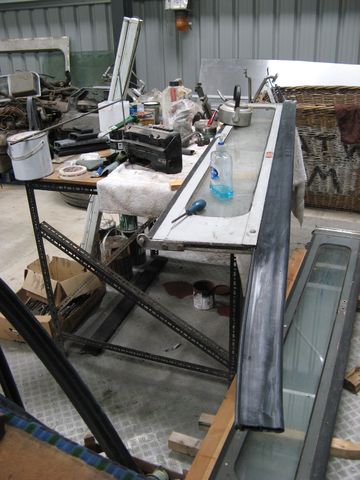
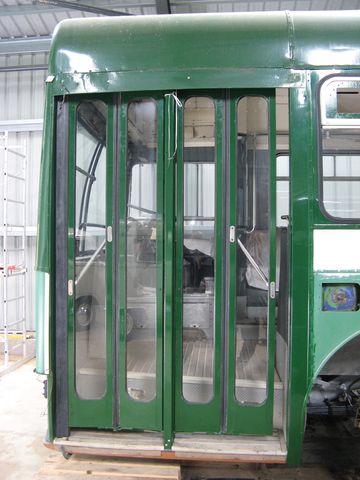
The first job was simply a try-out of the fit to the door-edge, for which a random door was chosen from the pile of original and donor-spares which sits at the side of the garage. With the door lying down, the biggest problem when working single-handed was to arrange a straight entry to the groove, which has sharp corners and doesn't offer much lead-in. With a bit of lubrication (note the liquid soap and a kettle) the nosing slid into place with enough resistance that it would not drop quickly under gravity, but not loose and insecure. Not bad at all, in fact, which was a great step forward compared with some of the trials that were offered. One of the other things that I learned when visiting MB90 earlier in the year was that the narrower, exit-door nosing is a stock item from COH Baines. I had ruled out the application of that rubber because I did not realise at the time that the nosings differed between entrance and exit. It is acknowledged by those that have tried it that it isn't perfect, but with a pair in stock for my own exit doors and the benefit of a try-out earlier, I would say that my replacement part was a better fit - but then it was designed for the application. Peters doors must have been very standardised, mind, so there is some surprise at that. It was soon apparent that the nosing cannot be inserted with the door in place, so it was time to go around the houses again and undo the hinge at the top of the door, insert the nosing and try to judge the correct length. It was a royal pain, to be honest, but I have become much more adept at the touchy-feely insertion of the screws into the sliding nuts, and it was also necessary to correct the entire hanging geometry so that the doors hinged together properly when fully opened. It's remarkable the skills one picks up in this business...... "So it goes", Kurt would say. Best of all, though, was that the doors would close with their new rubber, reluctantly at first, but once the rubber learned its new shape it was easier. One edge was enough for a first attempt, so the rear edge was left for a later session, which was not long after. So, I can now say that remanufactured entrance door nosings are available from stock if you need any.
A long-neglected matter has been the stress-panel, or lack thereof, between the exit rear pillar and the wheel-arch. Since the part has been missing throughout my ownership of the bus, a bit of guesswork and research has been in order. At last I twigged what was necessary, from examination of the offside repairs that I inherited, and set about measuring-up for a replacement. A sheet of 1.5mm steel wasn't a problem, but bending the return at the bottom certainly would be. I was pleased therefore to get a part made by North Wales Engineering, who now own the fabricating business of David Williams. Unfortunately I made a mess of cutting the curve which abuts the wheel-arch and had to go back, cap-in-hand for another, but mistakes are stock-in-trade among folk that try things out! We know what Kurt would have said. A complicating factor, but not an excuse is that the lower part of the body has a tumblehome; it's what makes the body look pretty, but it's also difficult to offer up and measure the fit of parts. After a lot of cursing, the part was correct in 2D, and just needed a workout over a Calor Gas bottle to develop the sensuous curve necessary to make it a 3D object. Then a surprising number of holes were required to interface with all the horizontal and vertical ribs, all drilling and cutting being done with hand-tools since there is no power in the garage. A remarkably warm weekend in November gave the opportunity to work on the part at home, using a power-drill to give it a good burnish with a 3M sanding mop prior to a coat of magical phosphoric acid primer and finally a coat of red oxide. A fair deal of fitting of the ribs is still required, because the stress-panel now sits on top of things that it should be underneath, but that is preferable to a complete disassembly of the riveted structure which has been untouched since it left Abbey Road, NW10 nearly 50 years ago. No, not that Abbey Road! That was NW8. Sadly, hanging the painted part in place was just about the last substantive operation of 2018, so we look forward to warmer days and more daylight. |




|
BACK .......to the index. |
FORWARD .......to continue the diary. |