|
BPH 106H SM106 Restoration 2024B |

|
|
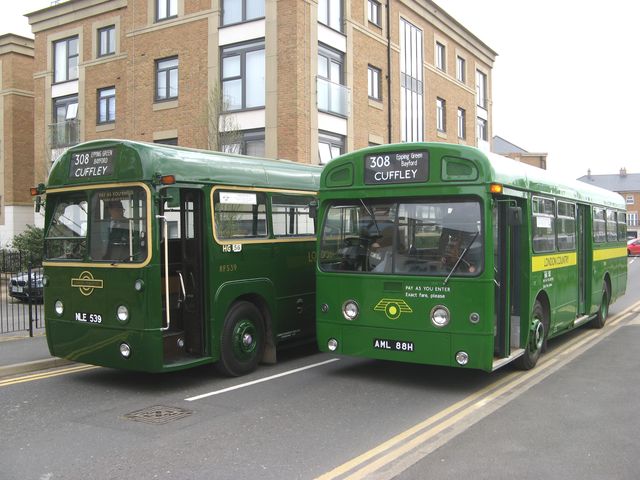
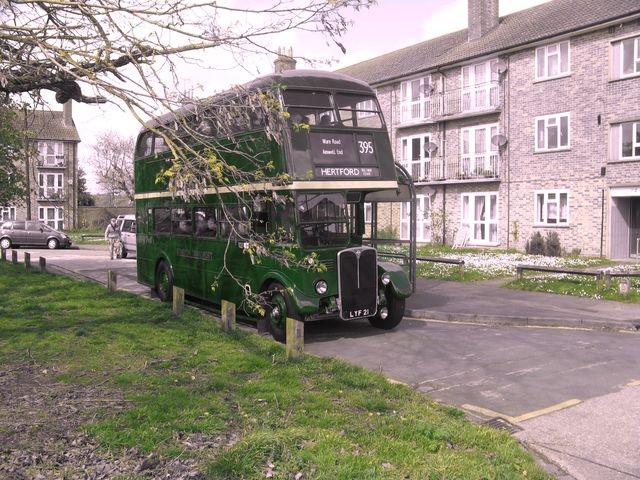
It seems to have become traditional that a new, Spring page in this diary should begin with a trip 'abroad'. The antics of the Amersham and District Motorbus Society by way of organising bus-running days in locations of note are legendary, but the latest invocation at Hertford proved to be an extraordinary tour de force. I made a weekend of my trip from Deganwy, stopping-over in Harlow, and following an itinerary intended to see the Elizabeth Line, which has come to fruition since my last visit to the 'patch' on a working visit to Excel in 2016. Doesn't time fly! The weekend went something like: Deganwy - Euston - Tottenham Court Road - Southall - Abbey Wood - Liverpool Street - Harlow Mill - Hertford - Benington Green - Ware - Hertford - Hertford East - Tottenham Hale - Euston - Llandudno Junction after which I was fairly 'tired'. Vehicles in use were (Classes) 397, 221, 1995 Tube Stock, 345, 720, SM, RF, RT, STL, RMC and 2009 Tube Stock, all well presented and getting properly stuck-into the job whatever their age. The services sampled from Hertford were designed to cover different vehicle types and it was fascinating to see the relative performances of the double-deckers of various ages over the same terrain. A most particular pleasure was my long-awaited meeting with SM88, which was my pre-booked taxi from Old Harlow to Hertford. Beautifully presented, and furnished with reproduction of vintage interior publicity and advertising, I found it unsettling in that the interior layout is still that of its SMD conversion, and thus both similar to and different from the PRV country vehicles. The ride was a real thrill, especially when experienced from my habitual 'front-circle' position by the emergency door. Hats-off too, to the young driver of STL2692 for having the brass neck to take such a demanding vehicle out in modern traffic, and demonstrating just what a step forward the pre-selector gearbox was in its day. The organisers must be commended for the excellence and efficiency with which the timetables unfolded, including the appearance of substitute vehicles to cover the workings. Seen from North Wales, the terrain of Hertforshire seems tame, but the position of towns like Ware and Hertford on the valuable water resources and river crossings has led to the road network offering some fairly steep climbs to their outer suburbs like Sele Farm Estate. Hertford was not somewhere that I visited much on my Green Rover tickets, but I knew the names from timetable books. The one regret of the day was not finding an opportunity to sample a GS, which I would regard as a characteristic bus for the town and its rural hinterland. I found it very disquieting that I was back in the land where I grew up, so familiar and yet so much changed. I guess it's "In my blood...........the River Lea, the River Lea, the River Lea" which is is a laugh, because the last time I was in Hertford, it was on our boat! Apologies to you-know-who. Well done, everybody!
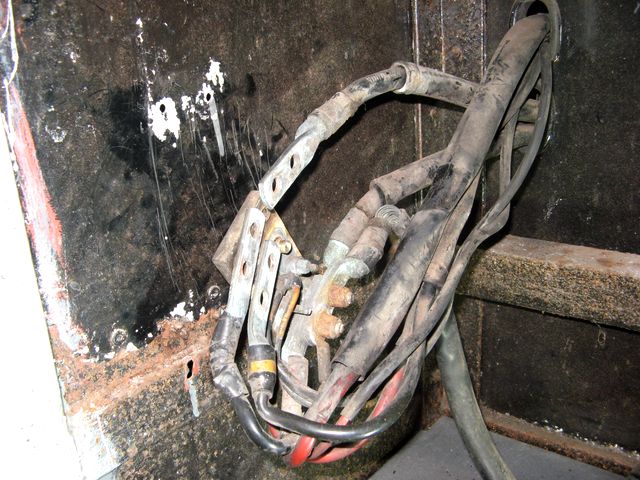
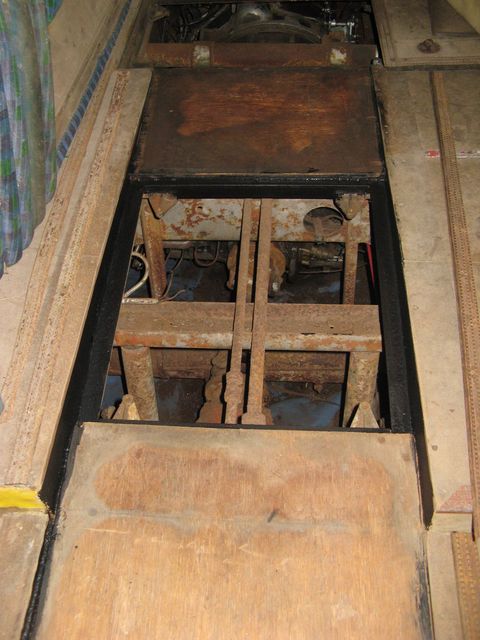
Meanwhile, at the other side of the forest, the task of preparing the area beneath the cab floor of SM106 continued. I have held back because I don't want to leave work unpainted, and the weather has not been conducive recently - but a warm window opened during the end of the week before the HG-fest. I spent most of one very grubby day with my wire brush and power tools going-at the rust, road-dirt and flaking paintwork, and a couple of hours painting the results with rust treatment. Both were jobs for ambidextrous contortionists. A lot of the framework for the floor is steel angle, which has a covering of rust, but is structurally sound. I don't think that any effort has been expended in this area since the bus was new, so the parts by the pedal gear are thick with oily residua but corrosion-free, while the lower parts are rusty because no paint has been put there. I hope that the situation is improving. The rear wheels have been fitted and the handbrake linkages checked for proper installation of clevis- and split-pins. Jeepers, fitting the wheels was a warm job! I was very pleased when my pneumatics parcel arrived, and scurried-off via Dragon Hydraulics for a couple of adaptors and soon came face-to-face with a problem. My specially-ordered valve did not have 3 ports - just a single hole straight through for the pressure input, so that it is easily fitted to a manifold, but I'd dealt with that on the way and sourced a plug to fit. The bigger issue was that it did not have an exhaust port, just a leak to atmosphere from the top - which was exactly the problem I had recently fixed with the failed unit that I was about to replace! Anyway, no need to worry for testing, so the old valve was removed and found to have an identical plug in its straight-through pressure ports. Ha! Another quid down the drain! After a bit of fiddling the valve was in place without much difficulty, so time to to fire up the generator and make air and electricity supplies. A weird feature of the door valve system is that the doors will close automatically as soon as there is sufficient air to move them, but the entrance remained stubbornly open. Then the true horror was revealed. Pressing OPEN would close the doors, and vice-versa. A moment's thought showed that I had ordered the wrong flavour of valve, and it should be the NC, the garage-geeks' favourite after all! Pressure applied to the control port of the ram OPENS the door, dummy-head. A rather expensive error, but easily rectified and this time ensuring that I found one with a proper exhaust port. Never mind, I thought, let's have a go with that gauge and find out what pressure is being applied. Soon fitted, the compressor was turned on again and I was able to observe the sudden rush of air to the auxiliary reservoir when the main reservoir reached 60 psi, then it carried on and went full scale on my gauge at 100 psi. There is room for confusion because the book says 'ancillaries' operate at 55 psi without describing exactly what they are, so I need to find the reducer and check its operation. I think I know where to look. I had a cup of tea and then went down the 'black hole' to prime the fuel-injection pump, as I had been forced to make a new pipe connection to replace the one with the cracked nut I had discovered. All good, fortunately, so I was able to go home satisfied that something was right after my efforts. The best news on my return was that there was no sign of any air bubbles in the fuel lines, so there is hope that the fuel installation is now sound. It was also gratifying to find that the reservoir had only lost 20 psi in two days, held up by the regulators alone because I am short of a proper olive for the doors air-feed and the pipe is dangling. After a bit of thought, and reading the book (Maintenance and Service Manual, Merlin Type 4P2R Passenger Chassis) carefully, things became clearer. There are, and should be, two regulating valves so that in the event of a lack of air supply from the compressor the air system 'degrades' gracefully. First the ancillaries cease to function (at around 75 psi), then the gears (at around 60 psi) so that finally there is only a sensible brake pressure which cannot be used by any other function. The book only mentions one reducer, which is set to 55 psi for the gearbox, but there is no mention of any reducer for the doors, which therefore must see the full reservoir pressure when working normally. I wish I had a body manual which explained the doors, because there is a 'sputnik' device on the front riser, just before the split for entrance and exit door air feeds. A filter, perhaps? The big issue for the session was to investigate why START does not energise the solenoid at the back end. Careful checks confirmed that nothing was 'wrong', so I started to check continuity and found that the positive from the button was good, and disabled when in gear. The negative from the solenoid went to the '6-way' terminal in the battery compartment, but I could find no connection to any of the negative cables that attach to the battery! It transpired that there was no continuity between the four negative cable-ends which join at the terminal block in the battery compartment, and worse, the nuts clamping everything down were steel Nyloc, and seized completely on the brass studs. The only option was serious torque and to shear them off (more new fixings required). Fortunately there was no other damage, and the cable ends were cleaned-up and clamped temporarily with some steel bolts from stock. Great rejoicing attended the loud clicking from the solenoid when the START button was pressed. I have to say that I have not been able to find any of the circuitry for inhibiting the starter when the engine is running. I suppose we should have faith in the carbon-based Engine Management Unit that supervises such things! After celebrating with a cup of tea it was time to insinuate myself into the underworld of the cab floor, finish the cleanup and apply rust treatment where appropriate. With luck, it will be a positive process from here onwards, though I am still waiting for a new boot for the foot valve operating rod.
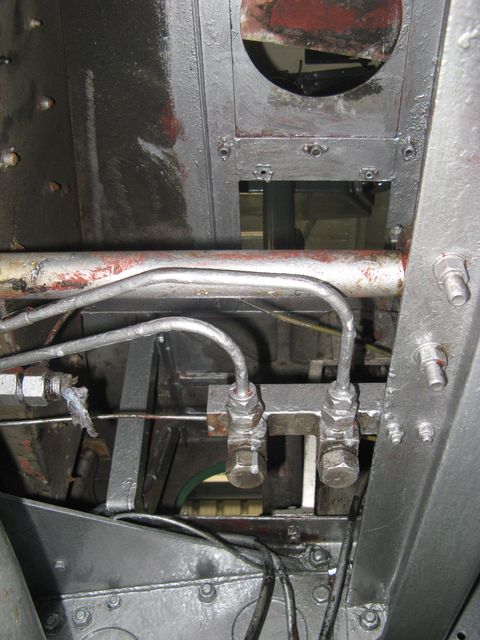
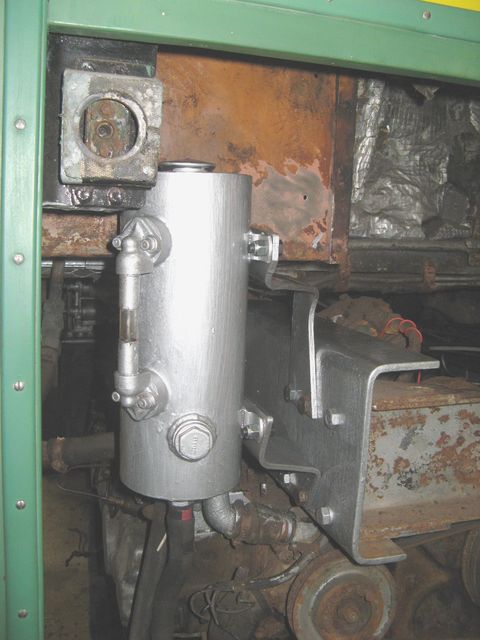
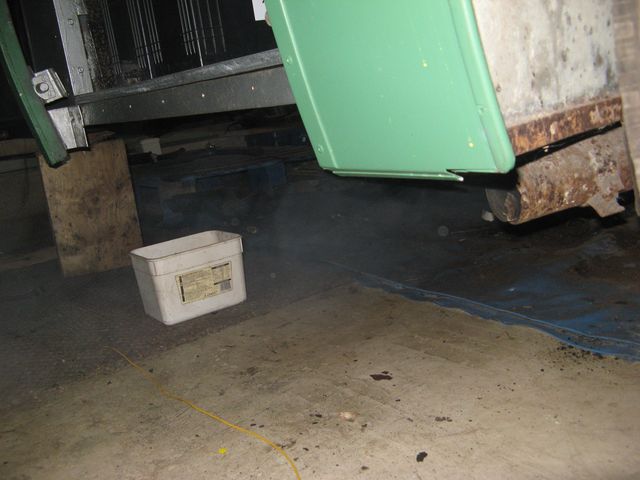
I have been studying some interesting electrical diagrams that came to me at Hertford, from my Hitchin benefactor. Marked "Theoretical Wiring Diagram Entrance and Exit Doors with Transmission Interlock", they show the full wiring of the door electronics but dated 1967, which is before the production of the 1MB and 2MB vehicles and not updated thereafter. A separate diagram shows "Wiring diagram - Schematic Entrance and Exit Doors OMO Vehicles" which dates from 1967 but was revised as recently as September 1971, and thus appears to cover the early-life period of the entire fleet. Bus-garage engineering intelligence that has filtered down the ages suggests that door electrics were a regular source of trouble, so the obvious simplicity of the air-powered doors on the Swift was a good move. Where, then, did the theoretical drawing fit in the design process? My guess is that it was the functional specification for the units manufactured by Potter & Brumfield, and the mysterious yellow boxes contain the transistor-based electronics for speed detection and the 'magic-eye' door closing. It still interests me that the control boards are common to MB and SM vehicles, and that they appear to be carrying around the abandoned 'magic-eye' logic and timing units! The spare control board that I have is labelled as originating from MBA171 at some point, and I can assure you that there is not a single transistor anywhere to be seen! Back in the workshop, the drive-motor pulley on Lottie the Lathe has been seen-to by my favourite local machining company, and re-installed. For a test-piece I turned down the heads of a couple of long, brass bolts to replicate the terminal posts for the battery connectors. I will now also be able to finish the pin for the radiator bracing arm. Ticking another task off the list, I drilled for a split-pin the nearside handbrake clevis-pin, and on top of it all, the new solenoid valve has arrived. A busy day is coming! But, when the day came, it did not quite go as planned, as I started by sticking-down the improvised Multislat flooring patches by the exit door, and disassembling the two-legged exit stanchion so that I could stand it up without damaging the header, and find out how to replace the Doverite covering. I was 'fortunate' in that Blue Lake had already done the same so that they could put orange bobbly-grip on it, but I still have to find or replicate one of each pair of little cups that cover the ends of each spiral run of Doverite. While the contact adhesive was drying, I fitted the newly-drilled clevis-pin with its split-pin. That was the handbrake rods finished! Finally, I could procrastinate no longer, and was forced, brush-in-hand into the underworld where I spent (honestly) the next three hours putting silver onto all the steelwork that had been prepared previously. At least it looked presentable when I had finished! In the image above you can see the round hole beneath the driver's seat, the square hole for access to the brake foot-valve and even see out through a headlamp aperture! The small pipes are the pressure lines to front brakes and to the relay valve for the rear brakes. I should add that the picture covers about 25% of the painting required, which included the front of the chassis by the towing eyes! Another fine day was spent on a number of more pleasant jobs, particularly the installation of equipment that had been removed from the chassis beneath the cab during the clean-up operation and painting. The horn was attached and its wiring refreshed, the junction boxes carrying the wiring to the stop-lights and kick-down switches were installed, the handbrake ratchet-quadrant was attached and the foot-valve has been measured-up for sourcing a new boot. Sadly, my supplier seems to have lost interest in finishing the re-manufacturing job. While my kettle was boiling, I laid more carpet through the saloon so I am not going to make a mess on what is left of the original Multislat, a material that now seems to be irreplaceable. It's very quiet walking around now, but mostly about finding a home for a load of old carpet that has become available. The newly-made terminal bolts were installed successfully in the battery compartment but I could not be bothered to get the generator out for any electrical testing. While I was fiddling with the exit stanchion, my Hitchin benefactor phoned to say that he had a complete one in storage, but it might be difficult to liberate. We had a great chat, and he said that originally the Merlin vehicles had straight exit stanchions, but they interfered with vision in the adjacent mirror - so the stanchion was modified to bolt onto the door header instead. MBs therefore have a patch on the ceiling, but SMs had the modified style from new. Amazing what you find that you did not know. After a bit of steady drilling and poking (with a punch) I managed to liberate the remaining cups, so now I can at least offer-up a pattern for replication. The larger one still had fossilised Doverite in it where Blue Lake had simply trimmed it back. Only the top, large diameter tube and the leg to the exit step were covered, of course.
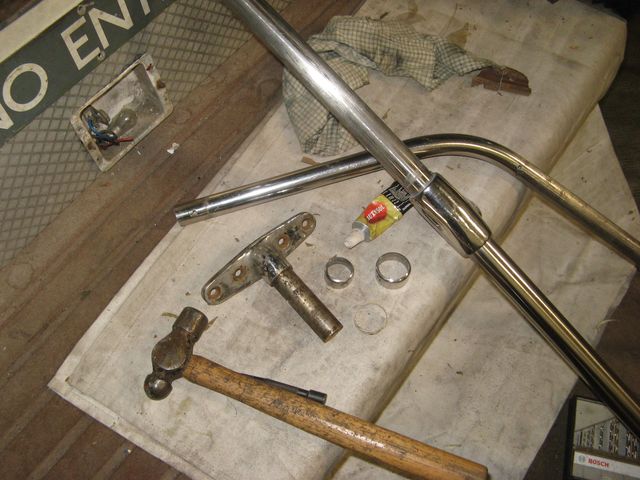
After the long and filthy saga of the cab-floor underworld, it is particularly pleasing to continue the process of rebuilding the bits that were removed to facilitate cleaning and painting. Sadly, I am still looking for a boot for the foot-valve operating rod, so that is on hold. The bell-crank and dropper for the throttle pedal, and the terminating bracket for the bowden cable have been reassembled, and the bell-crank assembly for the for the top of the engine has been installed. What a horrid workplace! Mindful that bits of body are still missing, I dug out the moulding for the front corner on the driver's side - which has been severely mangled where it met the fixing studs for the rear-view mirror. The problem here is that the mirror bracket needs a flat base to stand on, but the windscreen pan is curved at this point. I have a length of half-round aluminium moulding, so I had a go at making a flat surface for the bracket. It worked well enough, but there is more work to do on the interface with the original moulding, which still fits the lower part of the pan edge. This inevitably led to investigating why the movement of the bracket parts was so stiff, and disassembling it. The necessary stiffness comes from compression of a rubber bush, so there was no surprise in finding that it was just seized up! We don't want to be ripping out the studs while trying to adjust the mirror, do we? The other happy task was applying topcoats of chassis silver to the rear-end by the hydraulic-oil reservoir, and exploring the crazy set of fixing bolts that came off the hydraulic-oil reservoir. It's obvious that it was a lash-up, with rubber bushes used simply to space-off bolts that were over-length. A full set of new nuts and bolts have been sourced for the reassembly. Another fun day ensues, but this weekend it will be all hands to the pump for the Llandudno Transport Festival.
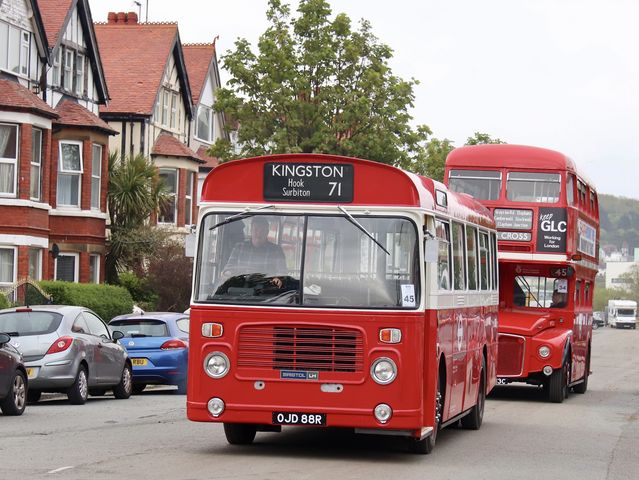
All normal activities came to a complete halt for the Transport Festival, and I am delighted to report that it went well despite the forced cancellation of the Conwy road-run. I did not participate on the Sunday run around the Great Orme, but watched the departure of the great convoy, which took 40 minutes to leave the field! So far as I am concerned, this is the great social event of the year, and it is fabulous to welcome so many entrants from far and wide to a huge, weekend-long party. Meeting new colleagues with a particular interest in LT vehicles was a bonus. It was a privilege for me to act as conductor of RML2515 which was short of crew. The vehicle is very well presented and received many favourable comments from passengers during my four round-trips to town. I even chalked-up my first Routemaster driving experience, albeit just moving the bus up the departure lane in our improvised bus station to give the driver a break. In such a public-facing role it was perhaps no great surprise that I was recognised by a number of local people in town with families, for example the man who did most of the groundworks for my bus garage! Llandudno hosts a big festival in town as well, which is very popular for a day out. I am writing this on the 'day after', and the sudden transition to peacetime activities like bread-making, grass-cutting and finalising my accounts was quite a shock after wall-to-wall heavy vehicles for four solid days. There were a couple of London Transport vehicles making their debut, particularly BL88 and RM2213. LT vehicle numbers equalled Crosville this year, but I still await an RT. Another debut was for my younger grandchild, who was delighted to find a special niche on the platform, and occupied the conductor's refuge while we were loading at the stops. Another convert to the cause (I hope).
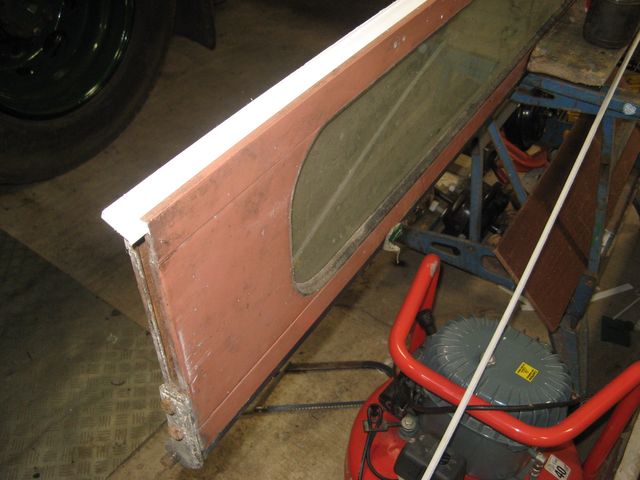
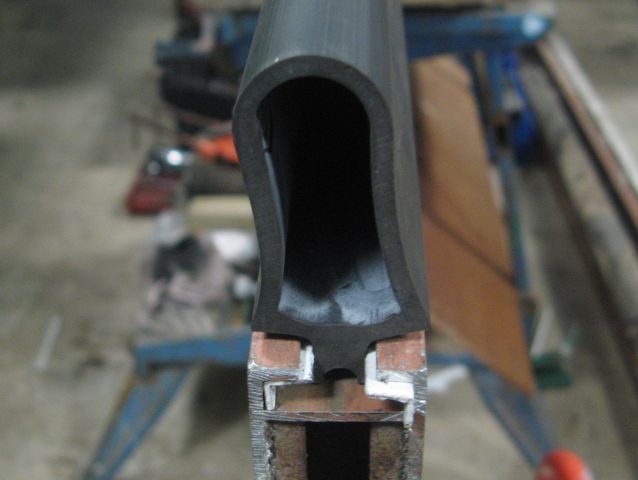
Further, 'peactime' acivities resumed at the bus garage after a short break to get life back on the road. First-off was the application of the new UNF nuts and bolts to fit the hydraulic-oil reservoir, which also involved opening-out the holes on its mounting brackets to take 5/16" bolts of proper length. It beats me how such bodges arise! Unfortunately, I don't have a parts-list for a bona-fide SM, just an SMW which didn't have power steering. "So it goes", according to Kurt. A drive of SMA8 has just appeared on my bucket-list (after an RT, of course), for the purpose of comparison. Anyway, the reservoir is now fitted properly, with matching bolts and looks fine. At long last, I have been in the mood to tangle with the spaghetti in the entrance door header and replace the solenoid valve, and am able to report that the door now opens and closes as it should, with accompanying light-show on the switches. I have never got round to finishing the mouldings around the windscreen, due to the unhappy state of the gutter which runs over the entrance. It does not affect the offside, though, so I dug out the crusty wood with its manky moulding which has been carefully preserved, despite new wood being installed a very long time ago. For extra complexity, the moulding is curved across its width to match the windscreen pan, so it was a relief to find that its lower part was in re-usable condition. The half-round moulding has two radii, the larger one fitting the GRP perfectly, but I had to improvise flat patches for the bracket to stand on. Unfortunately, it will not sit in line with the moulding which runs along the edge of the GRP, maybe because my studs are in the wrong place, but we will live with that. A spell of basic metalwork ensued, at the end of which I had cleaned-up original mouldings held properly with screws in the original locations, and a separate (de-mountable) length onto which the bracket sits securely. It is a pragmatic solution, and it is functional. As I inherited a bus with no mirror or way of fixing, I'd say that was progress. I looked wistfully at the box which holds my glass and painted parts securely, labelled "Carlyle Bus & Coach, Swan Village, West Bromwich" and thought that I had unwittingly played a blinder in taking not one, but all their remaining stock of rectangular mirrors of that size at a bargain rate. Life will never be the same again. The mirror-back was a present from Mike Lloyd, and the bracket came with the bus. I am intrigued to see that the basic bracket appears to have been a constant through RT, RF and MB vehicles, but the mounting of the mirror itself differs on the SM. It is interesting to note that pictures with sufficiently detail show that SM106 carried its original (pattern) mirrors until about 1992, at which point I presume that the bolts rusted away and the offside mirror dropped-off! More kudos for Steve Fennell for finding the correct part, one more. Yes, I know it's upside-down, but it isn't permanent! The mere mention of rubber causes black clouds to gather over the garage! A few years ago I was talking to Peter, owner of MB90 about the short handrails which fix inside the doors, and that led onto rubber nosings and his telling me that COH Baines sold a pattern which fitted the exit of his MB, for which I duly placed an order. I was a bit disappointed with the result, but put the whole problem on one side because the exit doors were far from ready for installation. Unfortunately, there is increasing urgency to complete the job, and the niggle of the floppy fit of the rubber has not gone away. The matter was more serious in that COH Baines no longer list IRS1084, even though it forms the icon for the Rubber Profiles section of their Web site catalogue! The exit-door nosing differs from the wide, entrance-door nosing which I had re-manufactured (and still have in stock because nobody seems to want any) at some expense all those years ago, and I have no special desire to go down that route again! After long contemplation, I decided that what was required was a filler which would insert into the door profile and stretch the foot of the nosing sufficiently to hold it more tightly. Measurement suggested angled material around 2mm thick with a leg length of around 6mm, which would have the effect of thickening the door profile to match the foot. It took a long time to find anything suitable, but eventually an order was placed for 10 metres of PVC trim 25 X 25 X 2 mm and it duly arrived (cut in half to make it acceptable to the courier and affordable). The problem then was that it was blatantly obvious that it was only 1 mm thick! After a bit of flannel, the supplier admitted that it was a mistake on their web site and offered a refund or replacement with a subtly different profile with a measured 2.2 mm thickness, which I accepted. Not worth sending the duff stuff back, as it was remarkably cheap compared with the carriage cost. Predictably, the 2mm thick material proved to be too thick, as it proved impossible to draw the rubber into its modified groove. The pressure exerted over the 2 metre length is considerable! In my experiments, I was also unable to really satisfy the requirement for making the nosing sit better on the edge of the door.
Detailed investigation and further experiments suggested that making the angled filler with unequal legs would not only fill some of the gap, but make the door-profile aperture narrower and hold the rubber more tightly. In the end the thin PVC angle was easy to work - 'sheet' plastics only need a heavy score-mark and they will snap along the line when folded. The instrument of choice was nothing more fancy than my marking-gauge, which could be set rapidly to the required thickness, and drawing the resulting profile across my plane smoothed off any rough edge. An hour or so of hard work produced four strips of PVC angle 6 X 7.5 X 1 mm, which were tried in the edge of the spare door-leaf which I was using as a work-bench. Drawing the nosing into the artfully-narrowed gap gave a much better fit than I had expected, and I look forward to moving on and applying the angled fillers to the (otherwise finished) exit doors and get them hung in place. Sourcing materials can be difficult at times, especially when you don't know exactly what you want, or what the options are. A recent shopping spree topped-up my stock of compression olives, nylon tubing (3/8"), radiator hoses and, fortuitously, a BSPP swivel elbow. A serious problem with the replacement solenoid valve for the entrance doors has been the length of the threaded portion of the original elbow fittings, which are designed to pull onto a flat base and compress an O-ring to seal. The plastic body of the chosen valve expects a shorter threaded length, so obtaining a seal is 'impossible', since the solid elbow requires complete 360° rotations to come into alignment with the inlet tubing as it is tightened, but would not penetrate far enough. Also, two elbows cannot be accommodated on the two adjacent ports, but fortuitously, I had a straight, push-fit/BSPP adaptor in stock from early experiments with the old compressor. This had a short threaded length and sealed perfectly, even though the exhaust hardly needs to seal! Quite by accident I was shown on eBay a 'swivel elbow' with the right connectivity - and a short thread. Now we were cooking! After the elbow is tightened down, the push-fit port can be rotated to the desired orientation, and Bob's yer uncle! All for the princely sum of £2-58, post free. "So it goes", as Kurt would say. Flushed with success, the tubing and olives were applied to replacing the link between the door-air regulator and the auxiliary-air tee, which had not sealed properly when reassembled. A ten-minute job, as was putting two turns of PTFE tape onto the steel adaptor for the valve inlet. I don't know why it would not seal, maybe it was damaged invisibly, and frustrated tightening by my predecessors led to the cracked casting. Who can say? Testing-time approached. The other important job was to measure the regulated pressure from the gearbox-air reducer. Finding a way of attaching my gauge was a problem, as nothing would fit the bona-fide test point for the purpose (another washing-machine hose job). Digging in my spares box, I found a 5/16" to BSPP adaptor which I had tried without success on the exhaust tubing of the entrance solenoid valve. This fitted the air outlets from the EP valve block, so top gear was undone and the gauge substituted. I put the kettle on for a cup of tea while the shore compressor filled the auxiliary reservoir and in turn shut off at its working pressure. The compressor outlet was regulated to 95 psi, so there was plenty of headroom before the compressor started-up again. I had also been savvy enough to site the generator away from the front of the garage to allow a relative silence to descend! Crawling underneath, I was immediately aware of a civilised hush which compared well with the the gentle hissing to which I have become accustomed. I fact, the only detectable leak was from the test-point which I had not tightened properly. Climbing into the cab, I opened and closed both sets of doors (tick), and for an encore selected first gear, which produced a reassuring click from the EP valve block (tick). Moving the selector towards top gear was followed by a gentle sigh as the first-gear cylinder drained (tick). Going down to the rear floor-traps, I was able to read the test-gauge and found a fabulous result: 65 psi. BINGO! As if that was not enough, I went round the entire gear-selector gate, and was surprised by a sound I had not heard before: a clunk from the reversing-light relay (bonus tick). All-in-all an excellent morning, and a celebratory lunch was taken. The remainder of the afternoon was spent making a new gasket for the thermostat outlet and trying some new silicone radiator hose and elbows on the radiator top pipe, which was very encouraging.
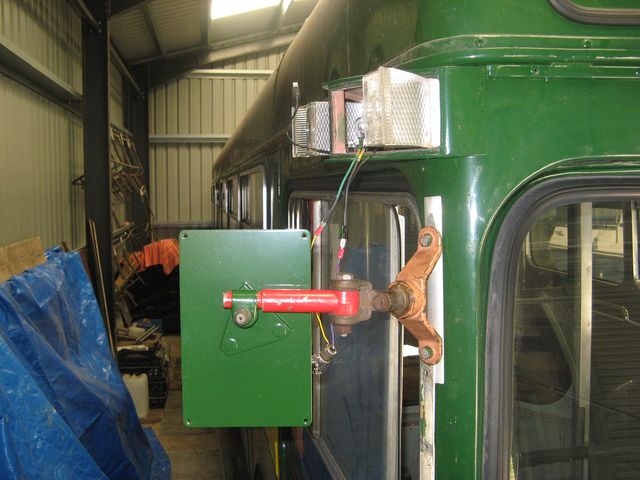
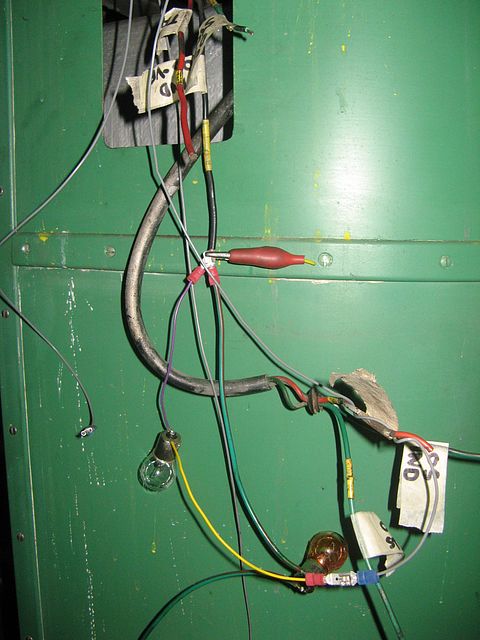
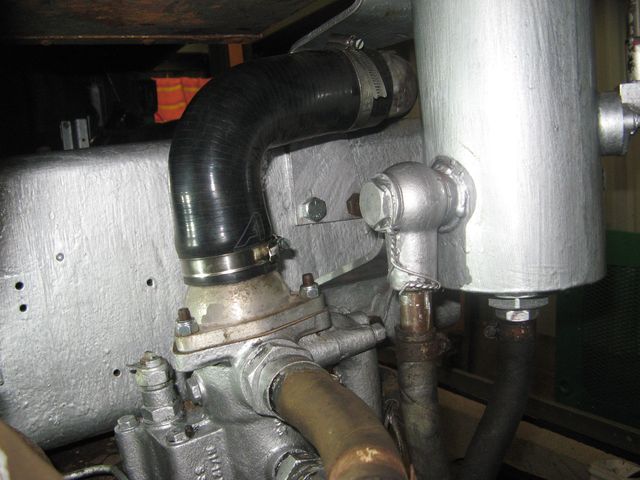
A day of steady rain precluded any useful outdoor activity, so I was allowed to bunk off to my bus. As the air system was looking pretty good, I decided that a day spent on the wiring would make a suitable change. First was checking continuity from the bus-bars through the stop-light microswitch, which is the only active part of the circuit. A false start on that task was resolved by working out which terminal was for the stop-light and which for the engine stop-solenoid because the wiring sleeves were only partly legible. Fortunately, it proved possible to pull down on the brake pedal lever from beneath the cab floor while probing the junction box, thus avoiding the need for an assistant, and I was rewarded by a beep from my meter. As previously established, there was no connection through the bus to the rear-end lamp cluster wiring. Three wires were therefore run through the chassis - one for offside indicators, one for stop, and the other for tail lights, both sides being energised on a single wire that then loops across to the nearside (through the number-plate lamps). The area behind the rear seat is a nightmare because there are two bulbs for the number-plate and another pair for the reversing light box. That lot must wait for another day, but after making a lash-up for test purposes I was rewarded with a bright glow at the back of the garage when I applied the footbrake, and when I switched on the stop-and-tail lights. The dead-ends of the faulty wiring were coiled neatly and left in the access box in the cab header, the new wires running through from end to end without any joins. Maybe one day the other end of the conduit will see the light of day and I'll route some new wires properly. The indicator casting was closed-up (see image above re driving mirror) and the diffusers fitted. It was a very rewarding sight with the flasher going properly for the first time in thirty years, especially on a gloomy day when they really showed. A warm glow to go home with! The next visit saw a serious start on reinstating the radiator pipes, with new elbows and modifications required for the position of the new radiator. Unfortunately, the top pipe fits very closely to the route past the header tanks, so a cut was made and a 45° bend inserted in place of the original straight coupling. Preparation work was also undertaken for various bits of painting, including the base of the driver's seat, which has now been assembled correctly with the little widget that prevents the support column rotating. Unfortunately, I had not observed that the bottom hose for the radiator was of smaller diameter - only 1¾" - so I was stopped on that particular workflow, pending supplies. The antics of my daughter-in-law ripping-up the floor of a bathroom, laid on 3mm plywood had set off a train of thought about the ramp on the upper saloon floor. I had in stock a sheet of thin Treadmaster flooring, so it needed a cheap underlay to get the correct thickness to match the nosing. Plywood! That in turn made me realise that there was painting and reparation to complete before that could happen, and it just happened that the floor traps were all open and ready for inspection. Jeepers, what a mess! Corrosion of the framing was quite advanced, and a couple of small holes had appeared. Curious, really, but I seem to recall that the aluminium wheel-arch was damaged, and probably prone to leaking in wet conditions. I couldn't find any such weakness, and I have memories of patching it with some GRP. First-off, remove the rotten plywood and immovable self-tapping screws (hammer, sideways, ping). Then chisel, scrape and brush at the built-up rust. It soon began to look better, and sandpaper was applied to the metal framing where it is exposed at the side of the ramp (originally the maroon-brown colour used for floor-level trim). I didn't want to start the generator specially, so I deferred tidying the remains of the fixing screws with my angle-grinder. The patch of Treadmaster between the differential and gearbox trapdoors turned out to be completely detached, presumably held down solely by their flanges. Underneath was horrendous. Oil-mist from the engine seemed to have permeated the plywood floor, and dust working inwards from the sides had built up thick, hard ramps so the floor was concave instead of flat. Eventually I had accumulated a couple of pounds of soil, rust and 'tarmac', and felt much better when it was in the bin. So good, in fact, that I ventured under the cab area again to check on the split-pin in the handbrake crank-arm clevis. AWOL! Close examination showed that the replacement pin, possibly from the other end of the operating rod, was too short. I am pretty sure that Maurice gleaned it from MBA545, and was very pleased by its un-worn condition. "So it goes", according to Kurt, who set off back to the drawing-board. While he was away, I broke-out the replacement morse-cable for the accelerator (which has been in stock for well over a decade) and threaded it through temporarily, ready for attachment. It seemed too long at the front bell-crank, so I went home to check my manuals.
The new silicone radiator hoses arrived promptly, so a session was spent making-up and clipping the various lengths of smaller hose to the bottom of the radiator and the header tank. It all seemed to fit together OK, and by the end there was less of a rat's nest of dangling pipework! The front door solenoid-valve was fixed to its bracket with a long screw, the driving seat was put back together and installed with sufficient screws to be safe temporarily. I have little confidence that I shall not need further access to the bus bars and door electrics before I'm, done! Then there was an ideal spell of weather to cut the grass outside, SP75 is working well with its new carburettor and the estate looks better altogether for its regular attention. After that it was back to the unfortunate problem with the morse cable, and detailed assessment of the fixing positions and lengths. It is a big disappointment that it is not a faithful copy of the original, now long-since scrapped by the supplier, Hindle Controls. I suspect that all can be redeemed by moving backwards the anchor point beneath the cab, but we need experiments with a G-clamp.
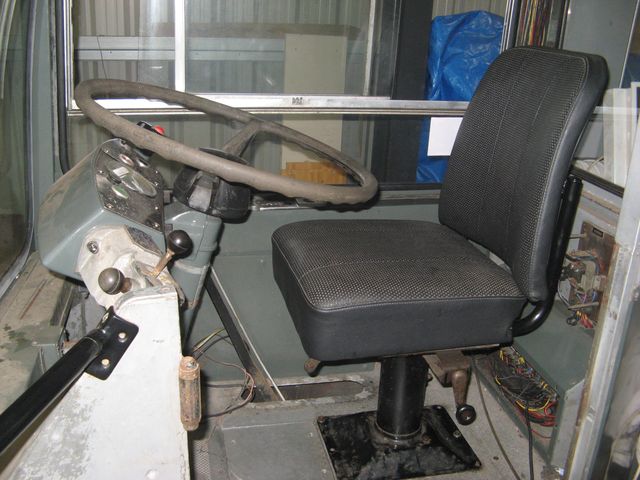
Well, it turned out that moving the under-cab fixing point WAS sufficient to achieve the necessary movement, but I need a volunteer in the cab working the pedal so that I can check for the necessary movement at the rear bell-crank. What fun rear-engined buses are! In other news, rubbing-down the poor job of painting on the front dash has commenced. Life is never simple, however! I started this week in a foul mood as various bits of bad psychology heaped-up, and to top it all my chosen pension provider had let slip that unexpected delays were due to their losing 45% of my precious funds. I needed some nice tasks and some quick fixes to retain my sanity, so I decided to apply glue to the Multislat flooring (which has been loose for absolute ages without any problem) in the entrance area. Maybe sniffing Evo-Stik isn't a great idea when depressed? I also had a big tin of coach enamel to try out on the ceiling panels - a spin-off from the sticky paint debacle of last year - the first of which was the entrance door-header flap and adjacent ceiling panel. This was quickly flatted and given a going-over, and proved to be a huge success apart from the fact that my two tins of BS Magnolia are surprisingly different shades! No matter, as I recall the ceilings of LCBS Swifts and Merlins were always a bit of a hotch-potch of colours, and I have only done a bit of determined messing-about which will be re-coated easily, and the finish wasn't brilliant anyway. Flushed with success, I vented my energies on the front dash rather than my pension company, and completed flatting-down the central (headlamp) panel. The sticky paint, which I had encountered for the first time in this area, dried more like fine corduroy due to brush-marks and I was ashamed by it! The following day was started with rubbing-down the nearside corner panels, which were left to dry properly while I polished and re-fitted the budget locks to the door-header flap, and applied the emergency legend. After lunch I broke out a new pair of tights (60 denier opaque tights are a fabulous filter-medium for collecting stray bits from gloss paint) and mixed up some Lincoln Green, cut with about 20% slow-thinners. It took about an hour and looked fantastic compared to the previous progress, so well-worth persevering. I had a cup of tea and watched it drying, while enjoying the aroma and feeling happier. When I arrived home there was an email saying the money had been found, so it had become a day of many successes, not least because my mother's lost hen had been found in the next-door garden after three days in the wild. Things have been a bit complicated recently, so progress has slowed, but things are still moving and the importance of finishing the front dash continues to grow. To that end, the green paint was allowed to harden properly before abrading with Scotchbrite and given a coat of varnish. That didn't go too well, and once again I was eventually forced to flatten-off some runs in the varnish! On the other hand, the search for a rubber cover for the brake foot-valve has come up with a suitable alternative. Part NTT28 (which is a Brake Pull-rod Boot for Leyland/Marshall 502 and many other tractors in the range) turned out to have useful characteristics, and was quickly modified and applied with a jubilee clip to secure it. The floor rail for the de-mister cover has been gloss painted and the remaining Multislat glued down, together with the white nosing in the entrace area. A sheet of thin plywood has been obtained for modifying the floor ramp in the upper saloon, and a start on cleaning up the steel framework which needs painting in the chestnut gloss. Lengths of pyramid edging have been cut to length for this area so that it can be finished properly. I was pleased to welcome another Swift owner to the garage recently, and shared info and experiences over a pint of ale and steak pie and chips at the Old Ship Inn at Trefriw, adjacent to SM106's former home at the old Hughes garage. Contrary to any suggestion of imminent demolition, the garage still stands as shakily as it always did, but I have no idea what horrors lie inside! We both enjoyed the recent visit of paddle-steamer Waverley to Llandudno, though I didn't go on a cruise as he had done. A mystery did emerge, after comparison with the driving seat of SM88, over the height of my own. With the seat adjusted right down, it is only just comfortably possible to get legs under the lower side of the steering wheel. The seat is still available from Chapman, and appears to be available in four heights! When, why and from whence mine originated is a mystery, and who was able to squeeze in to drive it?
In the end, it took three attempts to get the front dash varnish right, but it now looks very "acceptable" and ready for its vinyl decorations. Various bits of trim were given primer and undercoat ready for final assembly, and a trial fitting of the brake valve looked very positive. The valve was returned to base for attention to fitting all the plugs and adaptors which were removed during the remanufacturing process. A couple of days elapsed (due to requirement for decorating services to be applied elsewhere) before I was able to carry on, the first task being to drill the fixing holes for the nearside wiper motor. I had avoided this in order to reduce the number of dribble-inducing, paintbrush-interrupting discontinuities while painting the front dash, but in the end it only took about 20 minutes with a large drill to register the pop-mark to initiate drilling through with a series of increasing bit-diameters utilising my father's big machine. My own will not hold a ½" bit! A trial fitting was made from the front because of the length of the two securing screws. I had done some homework before setting out, so that I had a clear idea of where to place the vinyl decorations. Ironically, it was a fabulous shot by Steve Fennell of SM479 and Green Line RF173 at Amersham Garage which gave the necessary overview, though Barry Lejeune's equally iconic image of SM143 (how did he manage so successfully to create a fusion of candid street-photography and bus-related documentary?) was equally useful. Both images from London Country by Akehurst and Stewart, second edition 2001. The bottom of the 'wings' of the 'flying-polo' runs along the centre-line of the light-fittings, while 'PAYE' starts at the centre-line of the de-mister air inlet. Not a difficult formula to follow, which is important, of course. On the real thing, the dimensions were 'polo' 6" above the bottom moulding, 'PAYE' 3½" below the upper moulding. I won't bore you with the details, but it worked out OK after a bit of an issue with the 'Exact fare, please' lettering sticking to the backing, but I managed to avoid significant bubbles in the big, central 'London' disc which I was particularly worried about. I had lunch and sat in awe at what I had created. How can a bit of vinyl transform the appearance so greatly?
After the gentle morning build-up, the afternoon show was the big event. A couple of new batteries and a linking-cable had been purchased through my favourite auto-electrical outlet, ABC at Mochdre, Colwyn Bay. Before doing anything else, I had to finish the fettling of the wiring connecting strip in the battery compartment, and ironically the second pair of new, screwed posts which I had worked on using Lottie the Lathe could not be found. "So it goes", as Kurt would say. Fortunately, I had purchased an extra brass bolt in case of accidents, so the positive side was roughly bolted together as a temporary measure. Having checked that there were still no air-bubbles in any of the pipes around the injection pump, and loosened off the injector unions, it was necessary to crank the engine for a bit to expell any air. Then it was off to the cab for pre-flight checks. The simple pleasure of sitting in the seat and pressing the accelerator pedal should not be underestimated after the graft of dismantling, procurement, fettling and re-instatement of the bell-cranks, linkages and cable. Then again, after flicking the circuit-breaker, my hard work on the binnacle came to nothing when I pressed the START button, because the selector had again been knocked into its customary position in 3rd gear! I had to check the cab-light before that one dawned on me. Duh! Another safety feature tested, again! Cranking commenced, but no fuel emerged, and I quickly realised that the injection pump stop-lever was in the wrong state and had another go. It's a long walk to the cab from the fuel injection pump! This time I got fuel at all the union nuts, so I tightened them, put my foot hard down and pressed the button again. This time I knew immediately that it would work, and it did. The engine ran up for the first time since Spring 2009 and settled down to tick-over without any hesitation, albeit rather lumpily. I went around all the unions again and leaked off any remaining air (and some mucky-looking fuel), finding that most, if not all, of the cylinders were firing, which was a great relief. Exhaust smoke was not intense, but there was a lot of blowing and puffing noise going on - I am sure that even having the air inlet manifold wide open made unexpected noises. Not the refined chatter that you would expect from a classic AEC motor, but we are where we are and will move on. Mindful of the empty cooling system, I terminated the experiment by going inside and pulling the STOP lever on the pump, then opened the garage door wide to allow fumes to disperse and had a cup of tea to soothe my nerves. What a day!
The objective, of course is to try and move SM106, so that (when the weather cools down) the offside can be decorated properly with the benefit of access and visibility, but 'other stuff' cannot simply be ignored. Now that the front dash is fully painted and varnished, there is the small matter of the side and head lights, and the cans of worms that have been opened over the years. Both sets of lamps were in dire condition when I took over, but my benefactor made a fabulous present of a pair of sidelights some while back, which have been cleaned-up and painted to protect them from the usual agencies of weather and rust. Foolishly, I finished the mounting flanges in the same white gloss that I put on the 'reflective' inside of the pots, so that will have to be rectified to prevent any peeping from beneath the bezels. Then there is the matter of the headlamp clamps, which are rather corroded and missing some little self-tapping screws. New, pattern parts have already been in stock for absolute ages for the Lucas 700 reflectors. And, the dust-gaskets are missing or disintegrated. Fortunately, scrap headlamp bowls have been very useful in helping to understand how it all goes together. New pattern parts for the clamps and gaskets also appeared to be available - after all this is Mini, Land Rover and Jaguar technology! Sadly, upon delivery the clamps proved too shallow to grip a real Lucas 700 reflector or dimensional equivalent, but presumably work fine on whatever replacement reflector is specified. The gaskets were fine, though! Then there is the vexatious matter of the corroded floor-bearers which protrude into the upper saloon gangway. These were wire-brushed a bit ago, but it took a while for my angle-grinder to come to light. Having done so, it was soon put to work cutting back the remains of the fixing screws and a coat of rust treatment was put on the steelwork. This was taking place in the background, as a source of a new clevis-pin for the handbrake operating lever was being sought. Eventually, Paul Morris came up trumps, but the part is still in transit. The clevis pin is important because the business of moving the bus requires the handbrake as sole means of stopping! The day of the first attempt to engage a gear was not a great success. As before, the engine started fine, but moving the gear selector didn't appear to engage a gear, which was disappointing after so much successful testing in weeks and months past. One good thing that I checked was the oil pressure gauge, which really did show pressure! During subsequent fiddling, the engine stopped - air bubbles in the fuel lines showed that my temporary fuel supply was depleted. "So it goes", as Kurt would say. After that, things became a bit slow because hot weather and holidays have intervened: first a week on a canal boat with our grandchildren (who love the life; hilarious that their father was all-but born on our boat CAPABLE). Then (taking advantage of B&B for our spaniels with them) it was off to Scotland for the Great Grampian Railtour - a bespoke itinerary put together entirely by yours truly to enjoy Scottish railways from the re-created Inter7City trains which are the legacy of the beloved HST. It proved economically feasible due to the very significant bargains that are available for advance-single tickets from ScotRail.
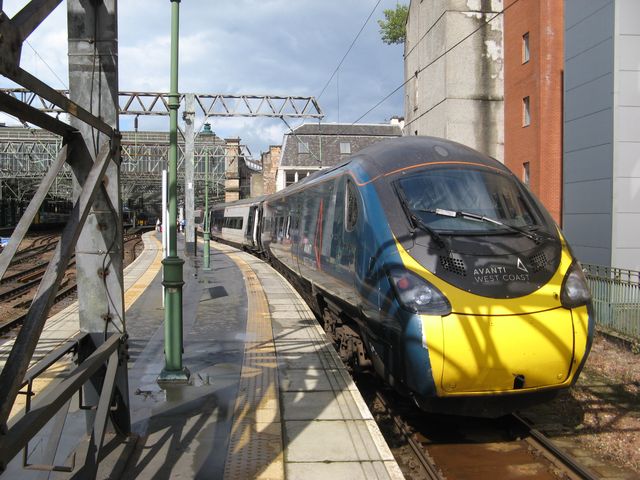
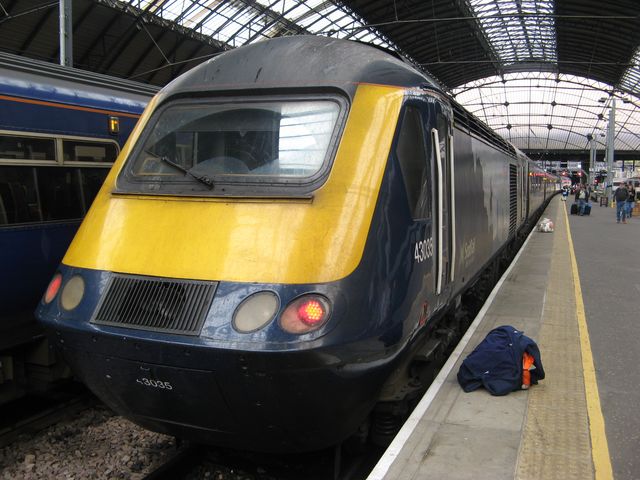
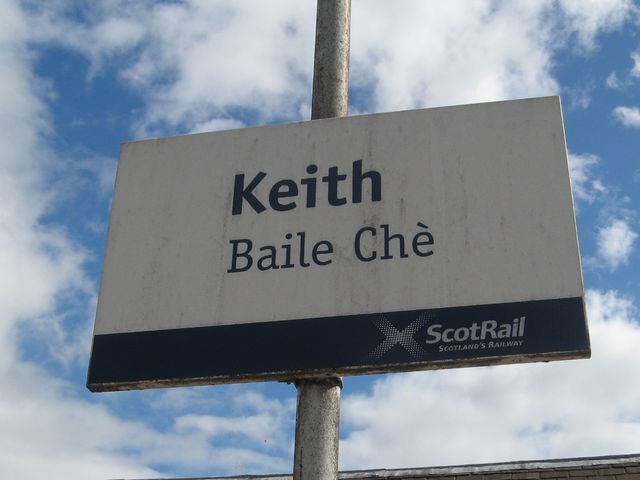
It went like this: Deganwy - Warrington Bank Quay - Glasgow Central (overnight stop) Glasgow Queen Street - Inverness - Aberdeen (overnight stop) Aberdeen - Glasgow QS - Glasgow Central - Warrington BQ - Colwyn Bay. A total of 1003 miles and 57 chains. The only disappointment was being subbed by a Turbostar to Inverness (booooo!) and some late running due to an ailing train of logs heading to Chirk which caused a bit of a traffic jam climbing Shap. The run from Aberdeen to Glasgow was an absolute delight; surely there is no finer ride than a MkIII at speed? Equally, I am very fond of a 158 SuperSprinter, which is nowadays the mainstay of the Far-North lines (last time I was there it was Sulzer Type 2s), and the few miles of jointed track taken at 75mph line speed were a thrill in these CWR times. Previously, I have featured Nigels in this diary, but here's a special dedication to all the Keiths in my address book (of which there are a surprising number). And, finally, an example of another favourite that I could not resist snapping at a stop. There was even a Citaro-G running in Aberdeen, which I was not expecting and could not get a camera to!
Eventually, back at the garage things were still on hold due to excessive temperatures, but it's time for a new page to carry on the story. |
|
BACK .......to the index. |
FORWARD .......to continue the diary. |
