
|
BPH 106H SM106 Restoration 2020B |

|
|
The second half of SM106's Golden Jubilee year is specially significant, since it was the 17th of June that saw her enter service at Leatherhead. Whether the Welsh Government will permit our immediate family to hold a small celebration in honour is uncertain as I write. Whatever else transpires, I am going to try and make this a great year for progress.
Working days are fairly regular at present, not least because a dearth of rock samples for analysis has seen my employment drop to two days per week. At least I can afford to indulge my hobby in these dark days of Covid-19 exigencies. As I had collected the welded-up moulding rail a day or two earlier, the first task was to put some paint on it to keep the rust at bay as long as possible. Red primer was applied at home, so it received a coat of grey to match the stress panel. While that was drying I pondered the problem of the engine access hatch (detachable valance in LT-speak). The issue was that the valance didn't fit properly, and the gap below the rail which spans the engine bay (No. 6) was almost non existent at the rear end and about 3/8" at the front. It was obvious that the rail had been replaced, not least because it bore no fixing holes, but also because very expert welding could be detected with care nearby. First I measured its distance below the uppermost moulding rail, and found that it was the same at each end. Good! Then I took my straightedge and laid it across the bottom of the bay - and immediately the answer was obvious. The spigot bracket which supports the lower edge of the detachable valance had been attached to the rearmost pillar in the wrong vertical position. It was obvious too, that the pillar at the rear of bay 6 had also been replaced, and therein lay the problem. A step was evident between the bottom of the valance and the adjacent quarter panel. After my thinking-coffee I found my spanners and removed the rear spigot-bracket, so that I could hold it with a G-clamp and test my theory. A perfect fit top and bottom was found after some experimentation and a deal of cursing as the clamp slipped off under adjustment for the umpteenth time. I also found that the original fixing holes had been augmented to avoid the problem of interfering screws in the confined angle of the bracket, which was jolly handy as I could improvise some new fixing holes on a different pitch (the movement required was similar to the hole diameter). Cutting off one of the nuts holding the pivot pin was necessary, but remarkably I have a stock of new, countersunk, quarter-inch UNF screws, possibly left over from similar work on the offside. At that high-point it was lunch time, and as I sat looking at the rear saloon from my armchair, I decided that the problem of patching the Treadmaster flooring on the ramp was easily solved (or at least diverted) by pulling it up completely. It took just 15 minutes, so my cup of tea was not even cold! The filth that had accumulated under the curling edges was appalling. You can see from the picture just how far from the edges the secure adhesive was. I think that this was brought on by Peter Comfort telling me that they have been restoring the proper treads to the stairs of their Routemaster. Very nice it looks in his pictures, too. I also went to the 'Long-materials Store' and dug out my stock of second-hand steel Treadmaster nosing (pyramid tread-strip) which I think was recovered from MBS464 by Tim Clayton and passed on during one of my father's regular trips along the M42 between Hitchin and Shropshire. Plenty in stock to replace all the required lengths (comprehensively removed by Blue Lake and replaced by yellow crocodile-teeth). No, I know I should not be working inside, but it's easy and I could not help myself. After the lunch interlude, I had to drill a new fixing hole in the rear pillar to act as a register for the spigot-bracket, and fit at least one screw to hold it. Once that was secure, the drilling of the bay 6 lower rail could commence, using the old moulding as a jig and riveting temporarily to prevent movement. That made me very happy. My only problem (fully anticipated) then was that the distance between the hinge pin and securing screw was too great to engage the screw which holds the upper-rear corner of the detachable valance, which necessitated removing said screw which is held by a split-pin. "So it goes", as Kurt would say. These assemblies, and the hooks on which the detachable valances hang are real LT antiques, and are certainly found as early as the Q type because I have had cause to do one up on the battery cover of Q83 at a Cobham Open Day. In my parts list the item has an RF number! Catching up with that dimensional mismatch will wait until another day! Another observation was that Blue Lake were in such a hurry to slap blue paint all over the bus that they did not even open the valance panel to paint its top edge! I will not be so lax when the time comes.
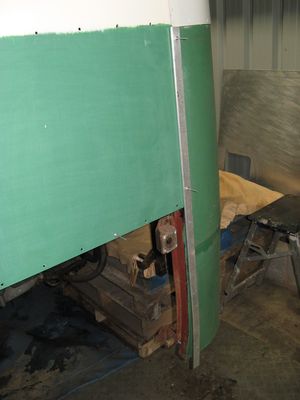
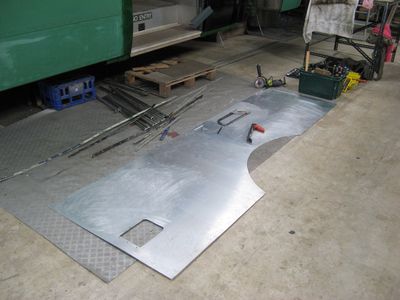
Finally, when I should have been packing-up to go home, I took some carborundum paper to the front destination blind box flap. Two thoughts were in mind: first, was the colour the same all the way, and second, what had happened to the legend "LEAVE BY CENTRE DOORS" ? Well, the answers came after about 10 minutes gentle, wet abrasion. Magnolia all the way, and nothing! There are two invocations of the imperative obscured by the paint that Blue Lake applied so that their own, delightfully non-PC "DISABLED PLEASE USE FRONT DOOR" instruction was not ambiguous. I think this is evidence that the magnolia is exactly what PRV applied, and that it was re-applied at overhaul (or repainting). It was definitely time to go home after that. After dinner I had a look at my stock of ephemera and fragile, flat stuff. I discovered items I had forgotten about, as well as a set of "LEAVE BY CENTRE DOORS" lettering in vinyl by Squirrel. I knew I had a couple of original, varnish-fix "Flying Polos", but had forgotten the matching "PAY AS YOU ENTER". I also found a LCBS fare chart holder with a load of charts, including (naturally) a couple of 418s for April 1974 and October 1975. The shock was that the fare from Kingston to Leatherhead had risen from 23p to a staggering 41p in that interval. Inflation or what? No wonder passengers were cheesed-off when the service was falling to pieces at the same time! Funny too, that I should receive then an email from Keith Valla who has been ripping up the flooring of his SM88 - though much of it was in better nick than most of mine. Work sessions are coming thick and fast these days. Whilst not entirely obeying the Covid-19 rules in my regular retreats to self isolation in the bus garage, at least I have a bona-fide excuse for not doing all the other things that get in the way! This time I was all psyched-up to attack the inside of the body which spans the engine bay, but the first job was to drill a couple of big holes in my workbench for my father's large bench-vise which came up from Hitchin via Clun. Now I can hold things properly and give them a good seeing-to. It ain't what you do, it's the way that you hold it that matters. However, displacement activities notwithstanding, it was time to fire-up my angle-grinder and cup-brush. A remarkable effect was that large flakes of black gunk were simply flying-off in the draught from the cup-brush. Evidently, this was paint that was not properly keyed onto the surface. It soon became obvious that the new lower angle and the stress panel were in fine condition with only surface rust, though the lower-quality inch-wide angle that appeared to be the floor support was rather more corroded, so I had to change to my Black&Decker with a smaller cup-brush, and that did a fine job. It was then only necessary to poke the thin brush into the inaccessible corners and it was time for rust converter paint (FLAG brand; if it is good enough for London Underground Limited it will do me just fine). While I was down there, I had a go at the automotive version of a 'fatberg' that was encrusting the rear spring-hanger bracket and the top of the chassis nearby. Several pounds of variably oily soil later and I could see metal again! The other thing that I noted was the poor condition of the heat-shield mat above the exhaust manifold, which wasn't exactly 'hot' That took until lunch time, after which it was back to the panelling on bay 6. It was nearly ready for doing-up the rear edge which interfaces with the quadrant panels, which has been a persistent cause of trouble - mostly because it is not the simplest bit of the bus, and my own inexperience. Mick Overton assures me that flat moulding was used all across the rear end and engine bay pillars, which explains my problem in running lipped moulding onto bay 6 where there is only call for flat moulding. "Milk in coconuts explained", as my Uncle Leonard would say. However, the panelling which I have inherited does not have the perfect straight edge which would make that possible, so I shall stick with Plan A, especially as I am going down the route which was eventually adopted as a repair-strategy and make the quadrant panels lap onto bay 6, rather than vice-versa. While weighing all this up I looked at the long waist-strip which carries the livery and number plate, and recognised once again that the switch of overlap sense had made a mess of its interfaces with its neighbours, and it was a bodge. After a cup of tea and removing the plywood top of the bench-seat footstool ready for its ultimate replacement, I had decided that the waist-strip had to go to the scrap bin, and in a few minutes it was removed. Cutting a replacement from my good sheet (see above for window aperture trim replacement) took about 25 minutes, and jig-drilling the fixing holes from the old one took another 10 minutes. I was pleased with my idea of screwing the paired sheets onto an old table-top that I use for sheet-metal working. There was no 'creep' while drilling the many holes, and the new one fitted in place perfectly along the straight, rear section by the number-plate box. I left the bending to fit the quadrant section for the next session! Before leaving I had a tidy-up inside and removed all the junk stored in the nearside, rear saloon, swept the floor and removed the yellow paint that is so obvious in the picture above which shows the Treadmaster removal.
Although the flat part of the rear waist-panel was easily made and drilled, the curved section was not so easy. Curved parts when stacked-up do not preserve their geometry in the same way, so it is not possible to perform the same trick of jig-drilling. After bending the waist-panel around a handy former (a 13Kg Calor Gas bottle) it was held in place by four screws by its flat end and the positions were measured from the old part and marked for the holes taking countersunk screws which maintain the shape while the quarters are assembled. I am pleased to say that slow, careful work meant that every one had an acceptable fit when drilled and countersunk, so that was a good job. If there was ever a bad place to start re-panelling a bus, that would be it, and my early, novice attempts really showed up! The metal was then cleaned-up and prepared for a coat of etch-primer, along with the nearside moulding that holds it in place. I explained before about splitting the moulding above the number plate to make it easier to work on each corner of the bus in isolation. Then it was time for the aromatic paint, which must be done quickly, and so it was. While it was drying I was examining the row of holes that carry the vertical moulding behind the rearmost side-window. They had grown so wide with the constant attention to damage that I was forced to consider making a new line of holes just so they would be secure, and after a bit I modified the length of moulding that was drilled to fit, but not trimmed to length so that when it was attached it would set up a new line of holes on the same pitch. Living dangerously now - especially as I have no new material of sufficient length in stock to replace it if the experiment goes horribly wrong! After all that, I crawled underneath and covered the rust-converter with a nice grey undercoat to fill in time while awaiting a contractor coming to give a quote for finishing the driveway in front of the garage. It is always a good day when the smell of paint fills the air.
I may be old-fashioned, but I have a view that a proper undercoat should be present under all parts of the body, in order to prevent the famous problem of the top coats cracking away from the moulding with age. So on the next visit it was the first job to put some ivory undercoat over the new primer of the waist panel. While the paint was available, I also put some on the livery stripe of the panel for bay 6, building up a nice base for the yellow gloss in due course, and making a fresh surface on a panel that was undercoated a long while ago. Then it was time to move on to bay 5 while that was drying, and checking the fit of the panels more or less cut to size already, one of which I inherited fully folded and still with its plastic film intact (that came off a good while ago, because it had not prevented oxidation of the surface. The art of good panelling appears to be the intersections between sheets. Fortunately, there are just two key intersections with the valance panel, but one of them is with the wheel-arch trim. That was a tricky job at the front wheel, so I was ready with all the dodges in my armoury. First the trim was cleaned up and straightened - not easy as it is a thick piece of metal. Heating it to the critical temperature over my camping stove so that it would soften was the prelude to undoing a significant bend which appears to have occurred in storage. Once the profile, which is a flat circle at the top, but with both ends curving inwards to match the valance, was correct it was offered-up and found to be a bit small in diameter. I changed that to being slightly larger by applying progressive, subtle effort in the jaws of the bench-vise (a useful bit of kit, now) because I reckon that a bit of compression will only push outwards on the arch, but tension will tend to pull on the terminal rivets, which are not very secure. While at the vise, I ran round the groove with my angle-grinder carrying a metal-cutting disc of the same thickness, to remove any burrs, paint, corrosion or cr*p that might impede the entry of the steel/aluminium sandwich. The fit of the valance panel to the steel arch was also checked and trimmed neatly with my jig-saw. Finally, the edge of the valance panel was thinned comprehensively with my curved surform, and smoothed with a flat file. That was a fairly comprehensive bit of fettling, but I am pleased to say that it all went together quite nicely at a second attempt. That called for a cup of coffee and a sit-down! I only have a foam roller to apply the etch primer, and they have a short service life faced with that particular solvent system, but making sure that the maximum service is extracted from each roller is an important economy, so I spent the rest of the morning rubbing-down and preparing as much metal as I thought I could handle in one go. The consist was the bay 5 valance panel (both sides), various short pieces of moulding for bay 6 and a long piece to run round the lower edge of the waist panel. The roller was just becoming seriously floppy by the time I had covered that lot, but it will be a huge leap toward to fixing bay 6 at last. The ivory undercoat was more than touch-dried by then, so I was able to go back to the upper quadrant panel and insert it under the flashing and gutter moulding ready for fixing when all the parts around the rear window have been fettled finally. I was too tired by then to go any further, anyway. A couple of sessions have passed by since then, and one of them proved to be quite amusing. Although the garage is obviously occupied, we have never organised a completion inspection for its 'building-regs' certificate, and it is long overdue due to its having been overlooked after my project manager lost interest. The inspector duly turned up one afternoon recently and stopped in his tracks by the door. "What's this doing here?", he said. I explained about it being a 50 year old London bus, but green, he said that he realised that as he had been born in Woking - pointing at the destination blind which was coincidentally set for a 437 to Woking! What he meant was why was it 250 miles from 'home'? After that he was less interested in the building than the bus, and went away quite happy on both fronts after lending me his phone for a picture in front of her.
As I am now working towards the final fixing of the nearside quarter panels, screwing down the moulding beneath the emergency exit window seemed like a good idea, so mastic was applied and 22 screws (all that I could find or borrow from elsewhere) were inserted. Fabulous! The main task of the day was to apply green undercoat to the bits that were primed previously, and it went swimmingly as it is altogether less stressful with the longer open time of the conventional paint. The other big task was to clean off as much dust and rubbish as possible before giving the whole of bays 4 to 6 a coat of bitumastic paint. I have no idea if it was simply a practice started by my predecessors, but it has been done at least once and it doesn't seem a bad idea. It's just like the old days, painting large areas with sticky black stuff was what I would be doing at this time of year to smarten our canal boat up ready for her long summer voyages, and the tin I was using was purchased for exactly that purpose! The following day I was ready to start attaching metal again, first cutting some sponge 'anti-drumming' pads to stick on bay 6. Now, these appear in the parts list and the advice is to cut them from seat cushion material, but there is no evidence that they were ever applied previously. I expected some sign of contact on the reverse of the scrap body panels, but there is none. The skin was duly hung on bay 6, and the valance panel on bay 5, ready for the day when the rivets come out to play. The vertical moulding on the rear edge of the upper quarter panel was the next target, and ten screws duly inserted from a new box brought to site. As new metal has been fitted to the rearmost pillar, new holes were required for the moulding, but a mismatch between the standard PRV drilling pitch and the countersunk rivets already in place holding the lower quarter panels meant that the lower rivet holes needed to be drilled at a different pitch. "So it goes", as Kurt would say. By some fluke, 3" was fine, with one short gap for the lowermost hole to sit one inch from the bottom end. Drilling the moulding and then holding it in place as a jig and drilling the pre-existing panels and steel pillar was quite hard work, but very, very satisfying. I am sure that something will turn out to be wrong, but I haven't found it yet. Then the upper and lower moulding for the waist panel were put into place temporarily so that the upper quarter panel was properly positioned and the new moulding fettled for length so that the new fixing holes could be drilled behind the window through the window trim and pillar. Again, hard work, and tricky to work with a panel that wants to do its own thing and requiring a large G-clamp to stabilise the job. After all that I was cream-crackered, and had to pack-up and go home for food and recovery. Even climbing on and off the scaffolding all day is hard work! A small cloud on the horizon was that I had virtually run out of etch-primer, and there would be little progress on bay 5 without it. Time to talk to M&P Paints again.
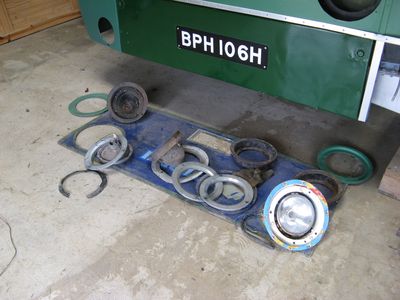
At the next session the highest priority job was to mow the edges of the field by the garage before the rain set in. As always, much time can be wasted by not dealing promptly with such tasks! Then I had an unexpected visitor, so the critical-path task of drilling the moulding which holds the upper quarter panel behind bay 6 was delayed a bit, but the half-dozen holes which were required were soon completed. The lowermost was a bit tricky, because I had to pick up the pre-existing hole adjacent to the moulding, but a bit of careful measurement led to success. The finished part was then prepared for painting, and given a quick coat of etch primer using an offcut of sponge as a brush/roller substitute. That was the last usable primer, as the final dregs became more sticky and intractable every time the tin was opened. Moving-on, it was the turn of bay 5, and the fitting of the upper panel to its bay 4 neighbour. I decided to set them up on the floor to avoid working around the nicely-prepared valance of bay 5. Getting the nibbled corners of the panels right is the key to a smooth finish when rivetted in place. After that the job came to a stand without the necessary paint to undercoat the panels, so lunch was taken. After lunch I looked hard at the front dash, the missing nsf corner panel and the various parts for headlamp fitting. All the captive screws from the three chrome-plated trims I have inherited were removed (a couple were missing from 106's originals) so that a pair could be sent for re-chroming if possible. I then spent a while working out how everything fitted so that I wouldn't miss something important when putting everything back together. Among all the parts and spares it looks as if I have a set of good parts, and a couple of green pans have been fettled already, but not attached.
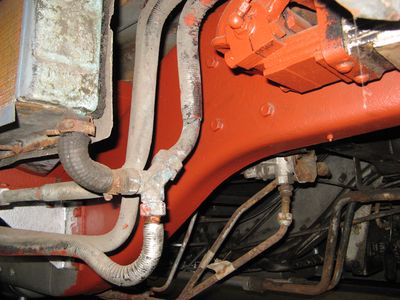
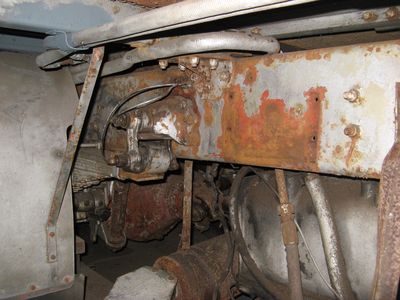
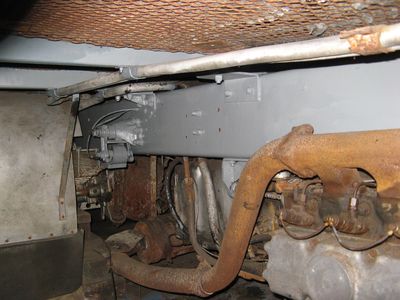
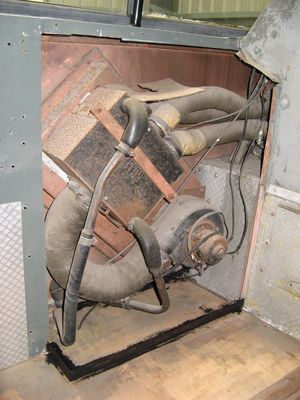
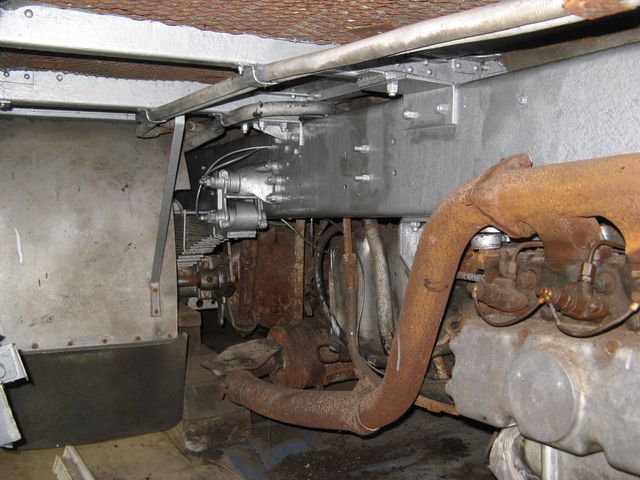
I was able to leave home a bit earlier than usual on my next visit, so was treated to the sight of the Ysgol Dyffryn Conwy school-bus taking up its route from the Black Cat (A470) roundabout at 0850h. Somewhat unusually, it was provided by one of Llew Jones' National Express-liveried coaches, which appeared to be rather an overkill for the two teenaged passengers waiting with studious indifference for it at Glan Conwy. I am sure they were both comfortable and well able to keep their requisite distance, and I did not spot any other takers on the route to Llanrwst. Meanwhile, back at my bus, the area of the chassis where it rises from the exit area carried its only significant outbreak of rust, and I am sure it had something to do with the very narrow gap beneath the triangular heater-air duct, which meant that no cleaning effort (even if attempted) was able to get the muck off the top of the chassis side-members, or allow the occasional offering of paint to reach the metal. This area received spray from the rear road-wheels and was very grubby, with corrosion spreading down the side as well as infesting the top. Several sessions with carborundum tape and various wire brushes (powered and manual) have been spent in this area, and rust-converter paint applied - though getting it into the gap beneath the air duct was tricky and impossible to inspect. A good, thick coat of primer over the top of the black treatment is recommended by the manufacturer, so I stuck with the usual red oxide for compatibility. The gap was painted by soaking a crepe bandage with paint and drawing it to-and-fro through the gap, hoping that all of the top surface would be wetted and forming a proper seal on the metal. Then I continued along the spring to the rear hanger and removed the bracket for the air-cleaner, which really opened-up access for brushing and cleaning. I also opened the floor trap (aka "The Hell-mouth") over the gearbox, which is in this part of the chassis, and looked at the grim accumulation of filth (principally on the nearside) banked up on the on the lower inside of the chassis members. Luckily, the two cable clamps situated here came undone without any fuss, so the wiring harness could be lifted up for a good scraping underneath. All this effort was interspersed with 'scuffing' the bare panels for bays 4 and 5 so that they can be painted when fresh paint supplies materialise.
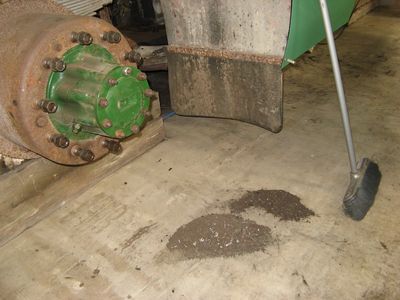
Work sessions were coming thick and fast, so it became a continuing saga of removing awkward and/or irrelevant fixtures from the chassis then grinding, scraping, filing or brushing the rust, old paint and road-dirt away, and repeating until I reached the rear end. I decided enough was enough when I arrived at the rearmost body support bracket, not least because there are electrical junction boxes to navigate in this area. Sweeping the floor after such a session led to an awesome pile of filth, so I took a picture to remind me. A great deal also transferred to my head and beard, but I did not take a picture of the shower base afterwards. A good coat of rust converter was then painted on and left to do its job for a few days before over-coating with a grey primer. I am still in arrears with paint, so the QAD (Quick-Air-Drying) silver will have to wait a bit longer. That means that other tasks must be found to make each journey count! For a laugh, I had another go at removing the layers of paint on the garage running number slide. From the overall colour it is a fair bet that it they are from SM533, which was the well-known source of a number of spare parts for the RM385 Group. The allocation history of this bus is well known, if incorrectly parsed by Ian's Bus Stop! Originally sold to Numark Chemists through Ensign, it ended up in the hands of Don Allmey who used it as a mobile shop. Apparently SM533 was only allocated at DG and SJ for any length of time, although spending time at WY apparently in store. If we look at the image of the archaeological paint removal process, the lower plate very clearly shows 'DG' under 'S'-something. The upper plate has a good 'S' and probably a 'J', and also shows that too much white paint was used at some point, but critically there is a letter with an indistinct, diagonal element on the right. Is that a 'Y'? and if so where was the 'W'? Well, we have to have a bit of relaxation from time to time while the tea cools! How I am going to clean them up for repainting is another matter of interest and investigation. The new Multislat flooring has still not been stuck down, partly because I have to clean-up and paint the floor-angle of the de-mister fan box. It seemed sensible to have a clean-up in that area and apply some rust-converter primer.
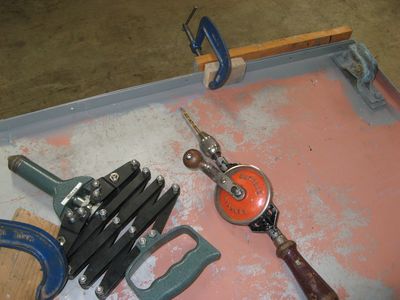
The fixing hardware for the offside, detachable valance-panels has also been dug out of storage, cleaned-up and given some primer, joining the nearside items as we move towards re-assembly. It looked like a proper production line when I had finished! Then it was time to drill the bottom of the valance panel for the engine bay now that the steel insert has been painted and hard-dried. There are certain jobs that can only be done with an old-fashioned hand drill, such as this one, where the slim hand-tool enables holes to be drilled in the formed edge from the inside. It isn't perfect, but it is now strong enough to paint! It is also proof of a long and active life, and being thrown on the floor by a hard-pressed garage hand. The saga of the oil-bath air-cleaner moves on slowly: Mike Lloyd has kindly sent pictures of one fitted to a St.Helens Swift-505, which just happened to be over the pit. I now know what it should look like (preferably without an astonishing mess of grit in the base), and surmise that the rusty interior of mine is final proof that the base has been missing for absolute ages. This week also saw the long-overdue completion of external groundworks at the garage - only the lockdown rules on association prevent a official opening party!
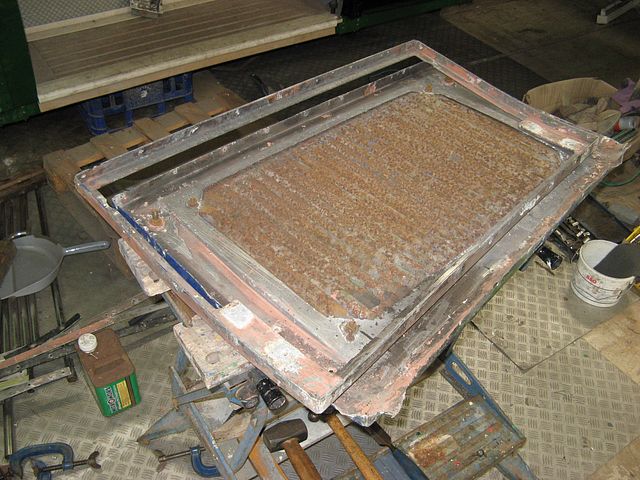
After a long wait, probably Covid-related, the new plywood top for the bench-seat footstool arrived. I had opted for a piece cut to width and with a minimum, sensible extra length to allow for cutting the shaped ends. When I did so, the wasted material was almost nil and I was pleased that I had not gone for the alternative which would have left me with most of a full sheet, with little potential use. Taking an offcut of Treadmaster lino from the long-completed re-laying of the floor beneath the lower saloon seats, it was quick to cut a neat, new covering. It will be finished off by a length of Treadmaster steel nosing which was recovered ostensibly from MBS464 before she was finally scrapped at Wythall, but where a long straight run with a curved end would fit an MBS I cannot imagine. Maybe it was actually from another vehicle altogether, but the coincidence of correct-ish length and a perfectly curved end seems astonishing. That lot will be glued and screwed into place when less pressing tasks come to the fore. I have a tin of brown paint matched and ready for the metal floor trim areas in due course. Mick Overton asserts that radiator covers with steel mesh were a PRV development for recertification after 1976. I have no answer, save that mine (sourced by Steve Fennell as a replacement) does not fit, which is genuinely disappointing since it is a ready-made and simple answer to the woeful condition of SM106's original, louvred cover. In view of his insistence I measured it all carefully, and the screw-cups are in the wrong position, as are the hooks, which are also spaced off with a couple of massive wood blocks. To utilise these, then, I will need to move all the fixings on the pillars, and (sorry, good people) I am not going to do that. Given its shocking state, the original panel would be a monumental effort to clean-up. However, the fact that advanced electrolytic corrosion has resulted in the steel louvre panel separating from the aluminium support in three of its four corners with consequent risk of leaving it behind on the road means that a hybrid solution is gestating. Watch this space.
Another long wait has attended the arrival of my order for paint from HMG's agent. Although I had specified single-pack etch primer, I found that the activator for the 2K chemistry had been sent. Wary in the past, I decided to have a go this time, all the while thinking that I would obtain twice the amount of paint for almost the same cost! The panels for bay 4 (upper) and 5 (lower) have been prepared and waiting for weeks, so it was really luxurious to be able to clean them thoroughly and get straight in with the paint. Mixing 1:1 resulted in a very thin consistency, but with fine sponge roller that was no issue. The open time was much better than the primer without activator, so I was able to roll it out consistently without any difficulty, though care was needed to avoid bubbles, and the dried film was super smooth. A win, and I wish I'd done this before! After a pause it was possible to turn the panels over and do the other side, so my coffee break was attended by great progress and a "strong pong" as they would say in the BEANO. A decent pause in the process was occupied by the bench seat footstool (see above) and lunch before the inside of the panels was given green undercoat and they were taken outside to dry quickly. Then it was time to open the third tin of the day, quick-drying silver enamel for the chassis, and get underneath and start the long march from the exit step to the rearmost body mounting bracket while painting the chassis outer-side and underfloor. Fortunately the weather and temperature were ideal for these paint-related tasks and I was able to take refreshing draughts of tea from time to time as an aid to straightening-up after crawling around the underworld. The silver took 2½ hours without a significant break, probably the longest spell I have spent on silver, and destroyed my paint brush. Finally the panels were brought in, turned over and the outsides given a green undercoat. The aroma was heavenly, but it was time to clear up and beat a retreat asap. More, excellent progress.
The next session did not produce such a visible leap forward! Damp and cold weather was not conducive to painting, so I glued down the Treadmaster lino on the bench-seat footstool, and then went underneath the bus to look at the air-pipe system. The AEC Swift is not unique in requiring air pressure to stop, but it won't go without air to operate the gearbox. Yes, I know that vehicles with spring-actuated brakes won't go until there is sufficient air pressure to release them, but mine is a primitive machine with air-pressure brakes. Although the air tanks are in place, they are only partly connected up following their removal for cleaning and renewal of fixing-straps so corroded that one had snapped! I am unsure whether the tanks decide how the pipes run or vice-versa, but for now they are fairly loose so that the tensions in the pipe-runs will ease-off. The air tanks never had any accurate locating device, just U-shaped straps to clamp them onto the chassis side-rails. The fore-and-aft location is 'hit-and-miss' and determined by the pipe runs. As a consequence of the chucking of all my spares and fittings into a heap in the old garage, some labels are lost and I was faced with a bit of a jigsaw-puzzle when I collected all the bits together. My attempts to understand the air-piping eventually bore fruit, when I realised that only narrow-bore pipe led out of the front tank, and that I had inadvertently installed the tank facing the wrong way. Curiously, the charge-air pipe leads into the front end of the tank, so I had to pull it out again and reverse it. After that it made sense, but turning the tank around was a bit of an ordeal because it's a job that literally falls to pieces when you undo the fixing straps. I also had to free off some nuts that had rusted onto the pipes. That's a problem you don't find with domestic plumbing with brass fittings and copper pipes! I was also reminded that one line had to be cut with a hacksaw for that very reason, so there is a deal of fettling before the air system can be regarded as complete. The other problem is that many of the pipe-support clamps have broken. Rust attacking the securing bolts has expanded, as it does, and cracked the plastic mouldings. I spent a sorry hour separating as many salvageable parts as possible, but the outlook is bleak. After all that, the pipe runs made more sense and once I had found the remainder of the run to the gearbox supply I was feeling a bit happier. A sort of plan emerged, where I considered taking units off for cleaning-up and servicing, but one look at the pipes attached to the rear brake-relay valve made me think again. The charge line from the unloader (brand new item in stock) is grubby but looks safe, whereas the wide line to the relay-valve was seriously corroded and impenetrably stuck onto the rear of the rear tank (LT's version of the Swift chassis for MB and SM classes has a divided rear tank for the front and rear brakes; only auxiliaries are supplied from the forward tank). No amount of effort applied from under the bus would shift it, so so can guess that it had to come out again, and this time I was able to turn the nut at the union, but the pipe was rusted into it and I was unable to turn the whole pipe due to its fouling the charge line which was also totally seized. I am now facing some serious re-building of the air system, with no skill, supplies or apparatus for making the necessary bends. A show-stopper, in fact.
Seeking an area in which to work more productively for a while, I set about separating the skin and louvre-unit from the original radiator valance panel. Not particularly difficult, but once again highlighting the sorry state that steel can produce when in contact with aluminium, and the very obvious problem caused by failure on the part of successive carers to paint the radiator side of the louvres. I now have a good frame ready for the skin and some old-fashioned panelwork skills. I am also looking forward to receiving a set of new studs for the offside-rear hub so that the half-shaft can be secured. Unusually, due to an outing to disused lead-mines in the nearby district, my canine assistants were in residence and I discovered the real purpose of the split front entrance of the bus. My body parts-list and the state of the vehicle (no fixing holes in the wheel-arch) agree that a steel truss panel behind the near-side skirt of bay 5 was not a feature. It makes little sense, however, because the pillar extensions are unsupported, and the one in the middle of the bay does not even carry the aluminium body panel, so has absolutely no function. The pillar at the rear of bay 5 does carry the rear end of the skirt panel and have a spigot plate for the forward end of the detachable engine valance. I reckon that the design is weak and inconsistent, so I have elected to fit the truss plate which belongs there. It's not difficult and it adds strength to the rear end. I even had unexpected, same-day service on the cutting and bending from my favourite metalworkers! It took about an hour to get the basic shape, which has a curved forward end to match the wheel-arch, and about the same to make some cut-outs for the places where there are brackets and fixings, like the spigot-plate and saddle bracket for the detachable valance. A set of 16 fixing holes was then drilled and the panel cleaned-up and painted in primer.
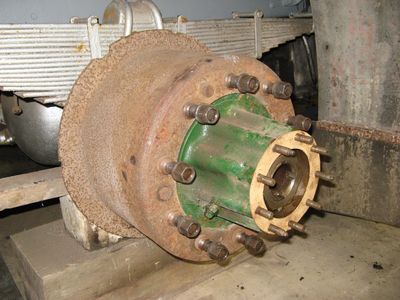
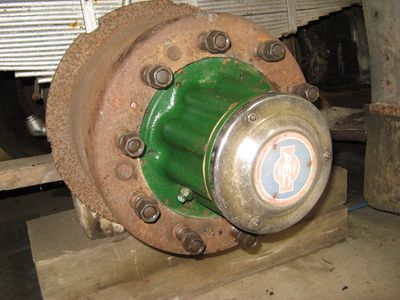
Short of something to work on, I attached the spigot plate and saddle bracket to their updated positions on the rear corner, and had another wrestle with my reluctant unions (sound familiar?), gave up and then set about tracing and understanding the small-bore nylon air-pipes which run from the forward air tank to a regulator, and ultimately to a union near the front riser which carries an unknown device and a tee for front and rear doors. I have a couple of coils of pipe and fittings ready to replace the primary run, which was damaged during chassis-cleaning operations a long time ago. Finally, while sweeping-up, there was a respectful silence for the full-length version of 'Layla' by Eric Clapton on the radio. 'Sounds of the Seventies' with Johnny Walker is the ultimate mood-music for an LCBS Swift, don't you think? Especially as SM106's life in Surrey lasted only between 1970-9! At long last the offside half-shaft was installed on studs manufactured for me by North Wales Engineering and a sufficient number of decent nuts found to tighten down on the new (and old) studs. The old studs were the specials which hold the AEC chromed cover, which were used to provide a reliable pattern. The actual source of some of the studs which were removed is unknown, and one at least had a significantly different (Nyloc) nut which could not be removed. At least we only need one spanner now! Thoroughly discouraged by the goings-on, or off, under the bus I decided that moving towards completion of the bodywork was the right thing to do, but one obvious thing stood in the way: fettling and preparation of the many metres of moulding that fit over the panels in bays 4-6. So, for several days the only real activity was straightening, stripping (as necessary) and rubbing-down of the bay 4 panel and all the mouldings. My sister came up with a wizard wheeze that combined a trip out for my father, Maurice, and a walk for her dog without dragging me away from the prime task in hand. So, after a long absence Maurice was able to view the progress that has occurred and have a bit of a change of scenery, while allowing my mother some time to herself for a change. I was concerned initially that he might find access to the bus difficult, but London Transport and Park Royal have done a great job in siting handrails or stanchions exactly where needed, so Maurice was able to ditch his walking sticks, climb aboard and move around the saloon without any difficulty.
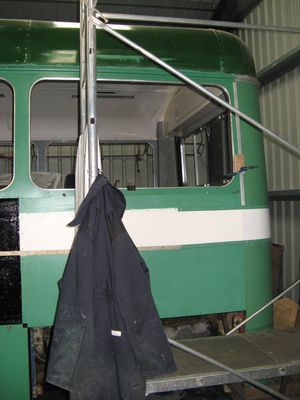
After all the rubbing-down and other preparation, it was a great leap forward to spend a whole day with a paint-brush (or roller) in hand. Efficient painting of both sides of long parts has always been effected by hanging them from a convenient hook or 'washing-line', but when the mouldings in question are 4 metres long a novel solution must be found. After a bit of difficulty I was able to pass a long piece of rope over one of the roof trusses, so was able to employ the usual tactic, but progressively hoist the parts into the air, so that on completion they were dangling from on high. Perfect! They are actually visible in the picture below, though it is not obvious what they are. I forgot that the panels for bays 4 & 5 should have ivory undercoat for the livery stripe, so it was added retrospectively to bay 5 while I had the paint on the roller for bay 4. One great inefficiency of using rollers is that they are not re-usable, and actually hold a lot of paint once they are productive (before which they will suck paint off the workpiece). So I reasoned that it was about time the livery stripe made a move towards completion while the going was good, not least because some parts have only had one coat. More rubbing down and cleaning! However, in one long move I did the whole run of the nearside and offside. The undercoat which I persuaded M&P Paints to formulate by tinting the HMG BDX primer is fabulous, the covering is superb and it was a joy to paint with. I can't wait to have a go at the ceiling inside, which is what is was intended for mainly. I always think it was a good day when the smell of paint is heavy in the air. With the bay 4 panel undercoated on both sides, the next shift started the final assembly of the nearside bodywork. First was to attach the newly-painted moulding to bays 5 and 6 above the detachable valance, together with the vertical piece between them. That took 31 rivets, and finished the morning. Sponge blocks were attached in bay 4 and then it was time to set up and drill the skirt panel and moulding-rail ready for rivetting. It is genuinely the case that either PRV or a previous carer made a mistake positioning this rail, because its proper position is a good half-inch lower that where my replacement now sits. Given that there are just two fixing-holes and the new rail is dimensionally identical, I can't see why the new one is wrongly-placed. I didn't realise that there might be a problem here, as all my panels copy the originals faithfully, but after a bit of faffing, measurement and persuasion the rivet holes were made and we were ready for the off.
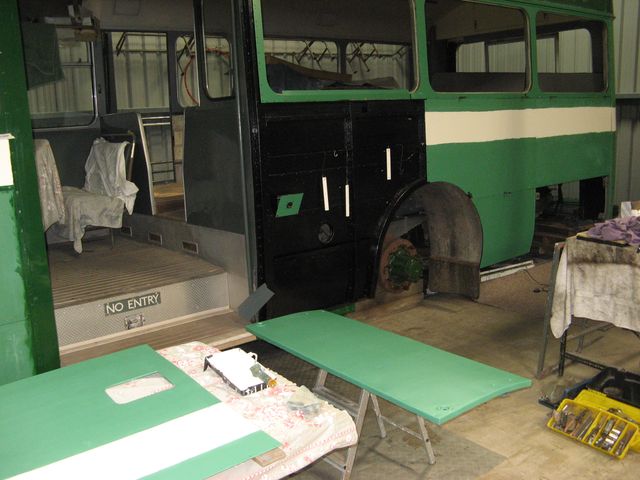
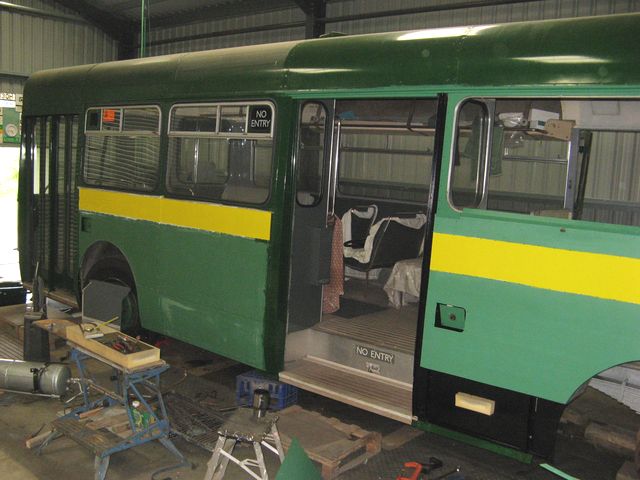
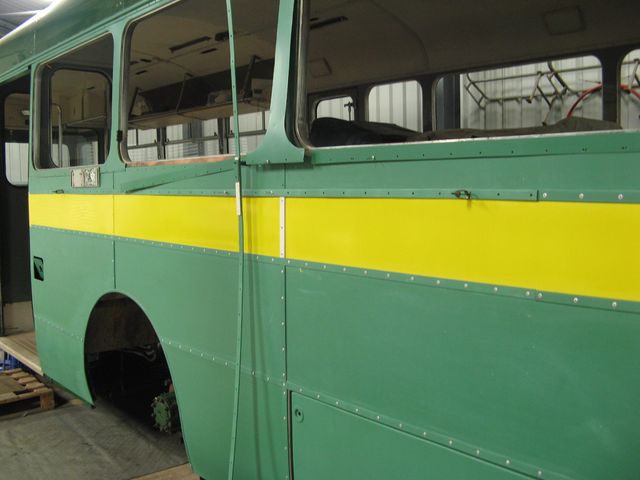
I did not feel up to more wrestling with any more metal, so gave my tin of Canary Yellow (more like Buttercup) a good stir and fetched a fresh roller. I reasoned that it would be easier to put a coat of yellow on the livery stripe of bays 4 - 6 BEFORE attaching the beading, because it would lay off perfectly on the flat, rather than have to work 'between the lines' of beading with attendant danger of sags and dribbles. To my surprise and delight, the yellow gloss rolled on well and brushed out very smoothly, with barely a drag mark in it. Round two to my ivory coloured undercoat! There was only one thing for it - emulate the previous session and go all the way. The result brought a warm, LCBS glow to the garage, and I was pleased that yellow adorned the bus for the first time since 1973. A good point at which to go home and celebrate! At the next session the lower moulding was fixed in place over the panels and the next step was to fit the wheel-arch moulding. I remember a tussle with the front one, so I gave the channel a good clear-out with my angle-grinder, but not enough as it turned-out. I have used thicker panels than the PRV originals, so they needed a bit of chamfering with a file in any case, but the thickness of paint applied subsequently made enough difference that the moulding was not going to give up easily. Add to that the presence of a certain amount of sticky mastic and you can imagine the scene. Anyway, after a bit more coaxing and easing it was Hey-Presto! and it popped on like a dream. After that it was all about finding and fettling all the bits of moulding that would be needed to finish the run beneath the window pans. Here we are breaking old-ground again, because I am reinstating the running-number slides above the wheel-arch, and new moulding is needed to fill the gaps, as it were. Nothing that was left on the floor would fit, so it was time for a bit of MCW trickery and re-purposing spare material recovered from SM533. Finally, there was more rubbing-down, primer and green paint; some of which was applied by mistake to a short length to run across the yellow band at the junction of bays 4 & 5. Drat and double-drat! The afternoon was spent attaching the moulding that runs along the lower edge of the livery stripe. These strips are odd because they are flat and have no junction of panels beneath, so shorter rivets are OK. Applying a bead of mastic along both edges was a fag, and lifting the floppy metal into place was a bit fraught. There was also its neighbour to run around to the rear number-plate, of course, which is screwed in place. I was rather unhappy by the area near to the emergency door-release flap because it seemed spongy while the moulding was being rivetted, as if the rivets were not biting into the moulding rail. Not good, but I was so horrified by the thought of undoing everything to investigate that I carried on regardless, but a bit unhappy about the outcome. Well it worked out OK and by the end of the day I could claim a score of 44 rivets and 18 screws inserted. All going swimmingly - until the Welsh Government applied the new circuit-breaker lock-down. Three weeks later saw a sort of Groundhog Day with a similar re-run ABOVE the livery stripe. That day saw 50 rivets and 20 screws inserted, and something like a bus was beginning to appear in the autumnal gloom. The same spongy feel afflicted the same area of the body on this run of moulding as well. Then I realised that the moulding rails are not continuous in that area, but are thinner, bridge-pieces where air can flow down to the heater-blower. "So it goes", as Kurt would say!
I received a surprise call from the owner of SMS91, the "Video Bus" of yore, asking for help with tracing mysterious pipework, so I spent an unhappy half-hour underneath the cab floor looking at what goes on pipe-wise. It became clearer after a while, because SM106 has some extra stuff fitted way back during the Launceston days, namely oil pressure and engine temperature and a duplex gauge for brake air pressure, the last of which I had forgotten. The mystery pipework on SMS91 is still a mystery, but my hunch is that there may have been a diesel-fired heater installed for use when stationary in video-cinema mode. I did decide, however, that a serious attempt at cleaning-up that area of the chassis is long overdue.
The urge to make progress with the remaining bodywork tasks stayed strong, so another assault on the moulding was launched at the end of November. This time the target was the run along the bottom of the widow-trim strips. They should be secured individually with countersunk rivets before applying the moulding, but I thought I would rather reduce the number of holes in the framing and only fitted a couple where panels were misbehaving seriously. A bit of mastic made quite good glue where they were under control, but it did become a bit messy - though it is easily cleaned-up because the non-hardening mastic is soluble with white-spirit. I am fairly sure that it was the Routemaster Web Forum that recommended the stuff, whose principal advantage is that it softens with the paint applied to it and becomes part of the paint system eventually. The final tally for the day was 32 rivets, which was a good one! That took me as far as the running-number slide (hung lightly in place for effect) and finished the body in bays 5 & 6. It is a really pleasant thought that a bit of painting is all that stands before putting back the windows. Finishing bay 4 must wait a while because there is a elephant in the garage, in the form of the rear corner return capping at the exit (in pink above). The RM835 Group did a great job in finding critical spares, but the yellow crayon marking in my replacement part states it to be SM/C/L330B, which is an entrance capping, not an exit capping. Exactly what the difference is remains moot, but the bottom line is that it does not fit any better than the one I fitted to the entrance, a good few years ago. I have commented before on the elegant bodywork put together by Park Royal Vehicles, and the inwards slope of the body (and windows) above the livery stripe. This makes the return capping a challenge to manufacture, especially where the lower end is curved to match the valance panel. My problem now is that the hinge-point is in the wrong place relative to the valance, which has the wrong curvature to boot. The curve is the definitely a case for welding, but the hinge is tricky. Thinking-caps required here, me-thinks! Before shutting-up the garage, I performed my regular ritual of winding on the destination blind, and chanced across a 'lazy' display of "419 EPSOM STATION and Epsom Brettgrave" which intrigued me a little, so I went to my June 1970 timetable and looked up the details for the route. Lazy-blinds are indicative of short, high-frequency services, but what I discovered was very interesting. The weekday 419 service from Langley Vale was hourly or half-hourly at peaks, but not serving Epsom Station. On Saturday there were half-hourly buses from the station to Brettgrave, on top of an out-of-sequence hourly service to Langley Vale. Odd, but on Sunday the service exploded from 30 minutes until late lunchtime to every 10 minutes before declining to quarter-hourly and then reverting to 10 minutes until tea-time, after which the service declined to half-hourly. Yes, hospital visiting hours! The hospitals were interesting, and known as the Epsom Cluster, built by the London County Council between 1899 and 1923 to alleviate overcrowding of London's lunatic asylums. Most of the large estates of the Manor, Horton, Long Grove, St.Ebba and West Park Hospitals have been taken over by large housing developments after closure in the 1990s, while the historic nucleii are converted for other uses. The 419 passed the door of all of them in a north-westerly loop, except St.Ebba's which was near to the Brettgrave terminus, but on the Hook Road which was traversed by the 418, and so often by SM106. It is now easy to appreciate why connections from the railway station were so important, and frequent for the hard-pressed visitors of distressed patients so far from home. "Those were the days", as Kurt might have said, but didn't. At the next session I discovered the difference between parts SM/C/L330B and SM/C/L329D! Those are the corner return cappings for the rear of the entrance and exit respectively. To the untrained eye there is no difference, but I soon found the reality. Having shot myself in the foot by trimming the top of the capping so that the curve could be offered-up for fitting, I realised that I had done exactly the wrong thing, and was forced to ask nicely for it to be welded back on! Thus, on my return with the part the game had changed to making the top section fit instead, and worry about the bottom afterwards. First I had to work out why the capping was so reluctant to slide into position under the gutter moulding. Once the scaffolding was in place for a close look, it was obvious that removing the rivet at the top had caused someone a deal of grief, since the hole was 'elongated'. That's a posh word for messed-up because the drill bit found the remains of the rivet mandrel too hard and went somewhere easier instead, i.e. sideways through the gutter. I poked about cautiously with a smaller drill, but there seemed to be something loose blocking the hole. Eventually I was able to dislodge and remove what turned out to be the broken end of a drill bit! That was unfortunate for someone - but I still had to get the rivet out of the steel cantrail under the gutter. Thinking laterally, I gave it a little tap with a hammer and centre-punch, which caused it to pop neatly into the void on the other side. Easy! After that the capping slid neatly into position and was trimmed to fit the aperture. The bottom end then had to be trimmed so that it could sit on the exit step, but there was a problem. When it did so it would foul the pole which carries the door leaves. Odd! Then the penny dropped, and I went to measure the capping on the front of the exit. Sure enough it was narrower than the one I was trying to fit - a whole inch narrower on the door side and about ¼" on the body side. That's the difference between the exit and entrance cappings (again confirmed by measurement). Without my jigsaw there was no further progress to be made, so I tinkered with my trusty Renault Espace while I had a cup of tea and then investigated the door-seal brushes. Steve and his team had recovered a whole set of four from SM533, which would be fine if they fitted SM106. I feared that they would not - but it turned out that one pair was longer than the other and a good replacement. As usual, of course there is the dreaded MCW drilling pitch to overcome, but I have in any case renewed all the metal that it touches, so it is not important and the original is in such poor condition that there is no option. The bristles are held in a steel channel, which has rusted badly (starting to disengage), and extra holes were drilled in Blue Lake days, so there is no hope. Funny how it is the rear brush which has sufferered; maybe it's just the one that caught the wet when driving on rainy days. As usual, the bristles have been painted, so the whole thing was smothered in paint-stripper and left to marinate.
Back at home, the trimming of the corner return capping was an unremarkable operation though not helped by the famous tumblehome to the lower, valance section. Once the formalities of Christmas (such as they were) had passed, I determined that work had to resume after a couple of weeks cessation. The car was duly loaded with tackle and it was only as I had almost arrived that I realised I had left the capping at home. "So it goes", as Kurt would say. However, there are always more than one job on the boil, so I just moved on to the next job: the radiator valance panel. This had been left at the stage of a clean angle frame, across which a new skin was to be formed, rather like an aluminium coracle, in fact. First, the stores were examined for a piece of metal - and incredibly there was a piece almost exactly right that had been cut on Simmal's guillotine a decade ago, so perfectly square. Just needed trimming for height - carefully measured so that there was metal to form the bends top and bottom (the latter not square of course) due to the upward slope of the valance at the rear. The first bends were quite easy because they were straight and FLAT, so they were formed on the 'ship', which is just long enough for a panel like this. Then the new skin was offered-up, drilled and rivetted temporarily to the top of the frame, then the bottom while using G-clamps to hold everything together as the metal was wrapped around the curve of the valance. Holes for the hooks were then drilled and held with ¼" bolts to ensure the maximum rigidity of the skin on the frame. Then it was time for a cup of tea, while listening to a sleety rain hammering on the roof. Refreshed, the next job was to improvise a former to clamp onto the curved ends of the frame to hold the sheet for bending. A piece of hardwood left over from the replacement of Rachel's double-glazing performed admirably once cut with a jigsaw and smoothed with my favourite, curved Surform. Then four G-clamps were attached, the distances checked and the bending commenced. The critical thing is to form the bend progressively all the way along, otherwise nasty kinks will be generated. The longer, forward end was done first (it went all right) and my four-course lunch was taken: cheese/ham/mango chutney bap, yogurt, one of Bridget's mince pies left from Xmas Day and an apple. Then the rearmost and final bend was undertaken in a similar fashion (which went better due to practice). The last operation was to trim off the excess metal allowances all round, and hey-presto, a blank radiator flap! The next jobs will be cutting the ventilation aperture and disassembling the spare unit to provide mesh and reinforcement before transferring the securing screw cups. All jobs to savour! One day, I'll rebuild a proper, louvred panel, but this will get us going without the ignominy of driving about without one, which was not uncommon! By the end of all this I was done-in and fit only for sweeping-up and going home before darkness fell. The last working session of the year was held in rather cold conditions, with snowy hills visible from the garage. Brrrrr! This time I had not forgotten the part I was planning to fit. Anyway, the first task was to complete some work on the radiator valance panel. The hooks were attached and the part offered up, but the fit was not very good. The original hook at the rear had lost its packing strip, so sat lower than it should, so when a hook with packing was fitted, the panel sat higher. Some work with a round file and a couple of smart taps with a hammer took up all the slack and the job was moved from 'active' to 'suspended awaiting parts'. The parts in question being some snap-head rivets to attach the fixing-screw cups; a hole saw will also have to be brought to bear to make the necessary, large-diameter holes - but only once warmer weather returns and paint can be safely applied. The exit pillar-capping was offered-up and tried for size. To my relief, the fit was snug and the only fettling operation that was required was to trim the bottom end and put a bend in to match the lower valance profile. Fixing holes were then measured-up and the painted moulding that was on hand was used as a template to set the holes down to the level of the door-release flap. Unfortunately I don't have a single piece of moulding with sufficient length to reach the bottom, so a joint will be necessary. As darkness had not set in properly, I carried on with preparing the draught-excluder strip which had been left marinating. I was pleased to see that the final layer of (matt grey) paint had detached completely, and the bristles were essentially clean. Remaining (cream/green) paint was removed from the metal by the time-honoured 'wide-chisel' method and the metal was rubbed-down. That was all too easy, so I continued by setting-about removing the fixing screws from the mesh of the NOS radiator valance panel, ready for the great day when it will be transferred to my newly-skinned frame. So that was that for 2020 - a funny-old year. As Roger would definitely say "Got to keep the loonies on the path", especially if you are running to and from Brettgrave. |













|
BACK .......to the index. |
FORWARD .......to continue the diary. |